Prerequisites
- An active Writesonic account
- Admin access to your Wordpress website
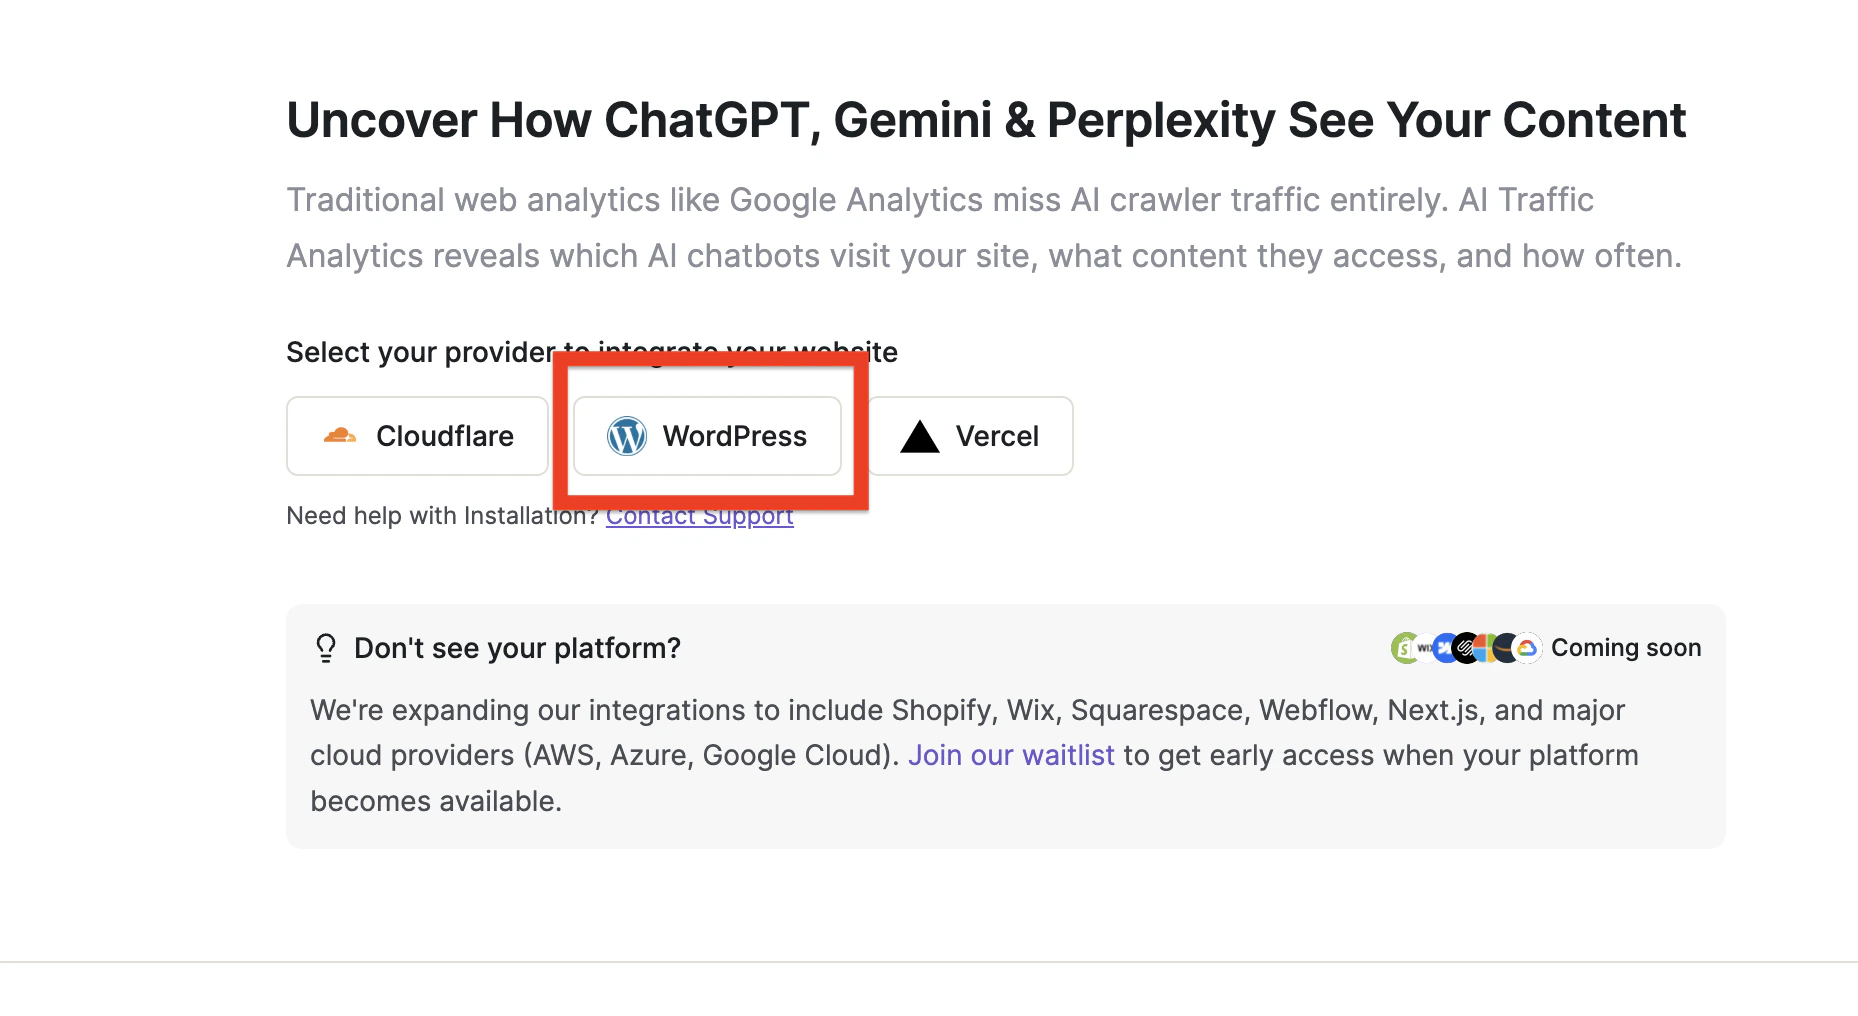
Start in Writesonic
- Head over to the AI Traffic Analytics page on Writesonic
-
Click on “Wordpress”
-
Enter your WordPress website domain and click “Continue”
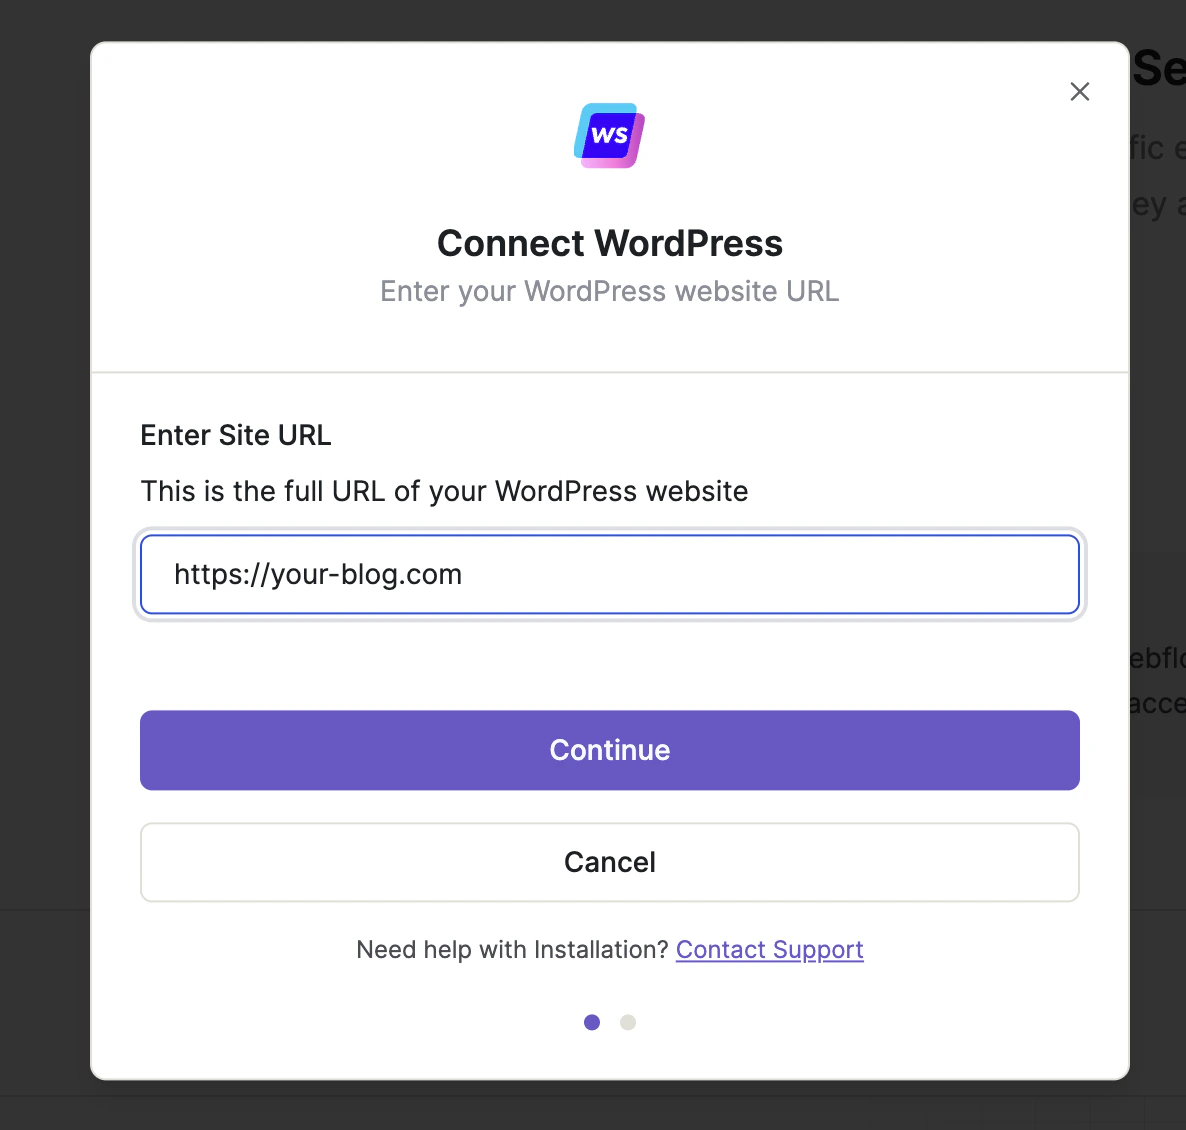
- Writesonic will generate a unique API key for your website. Keep this page open as you’ll need this API key during the plugin installation.
Install the Wordpress Plugin
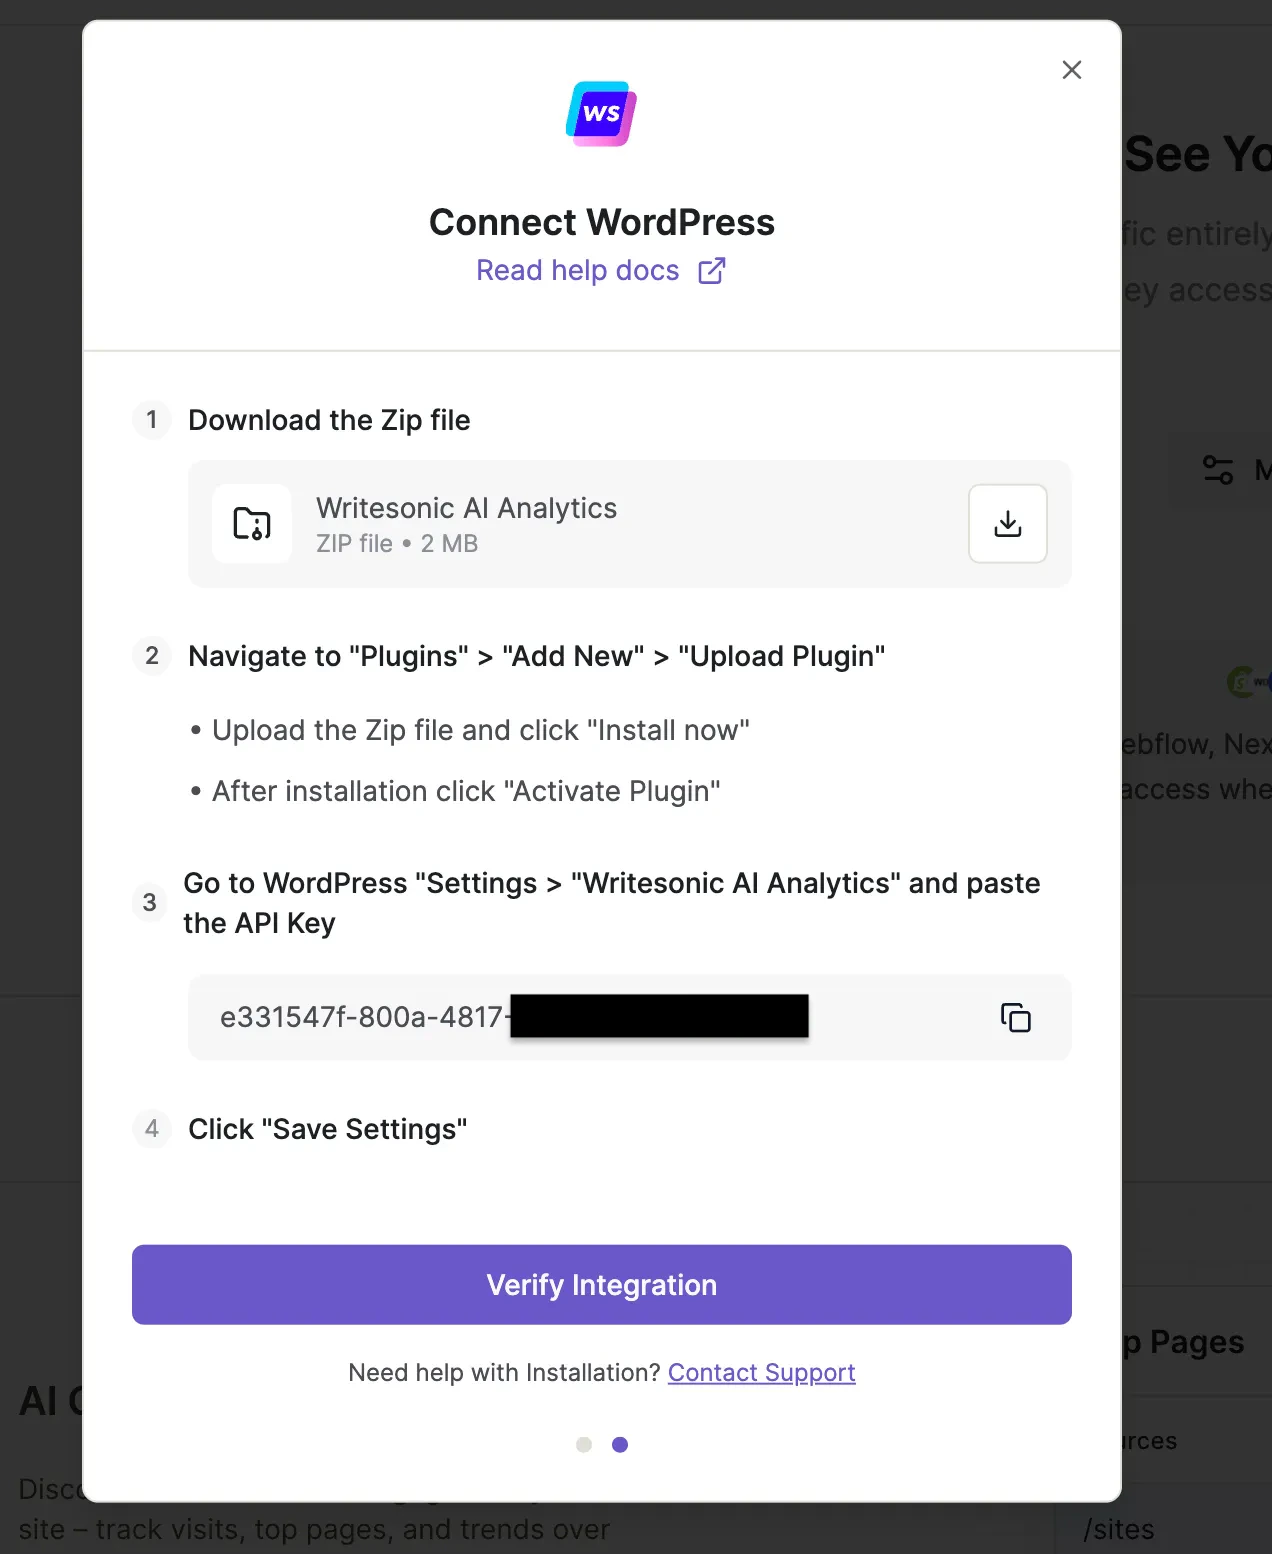
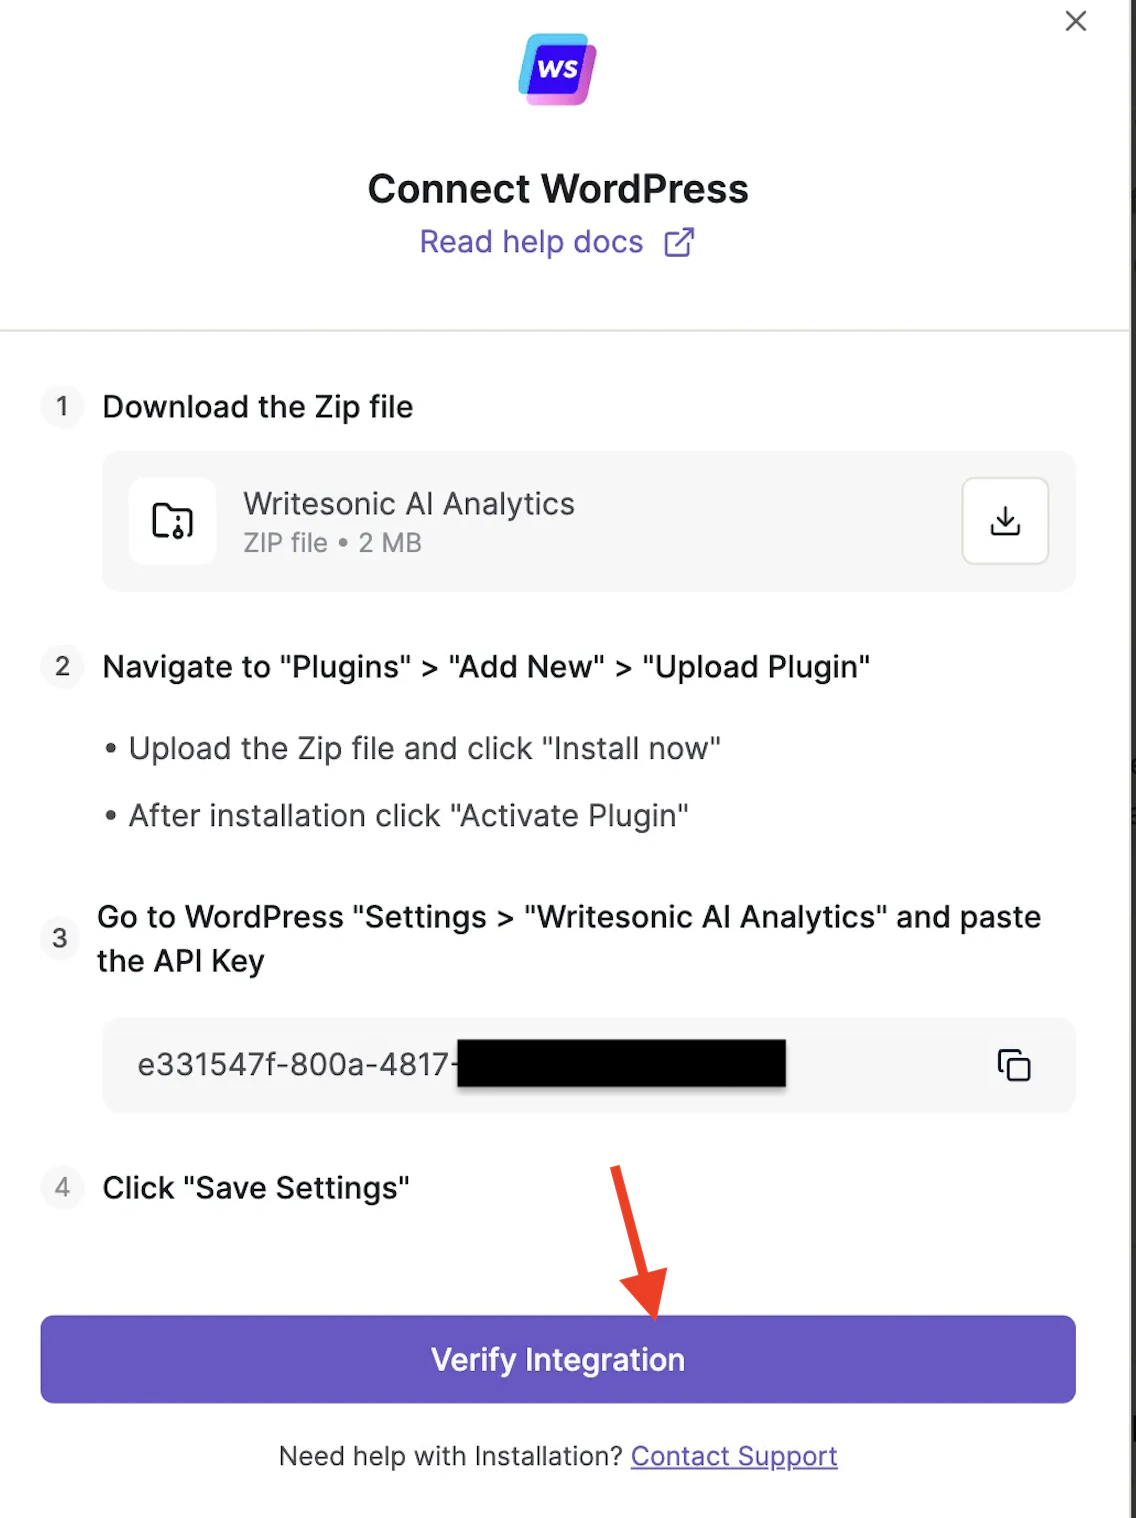
- Download the Writesonic AI Analytics plugin by clicking the “Download” icon next to the zip file
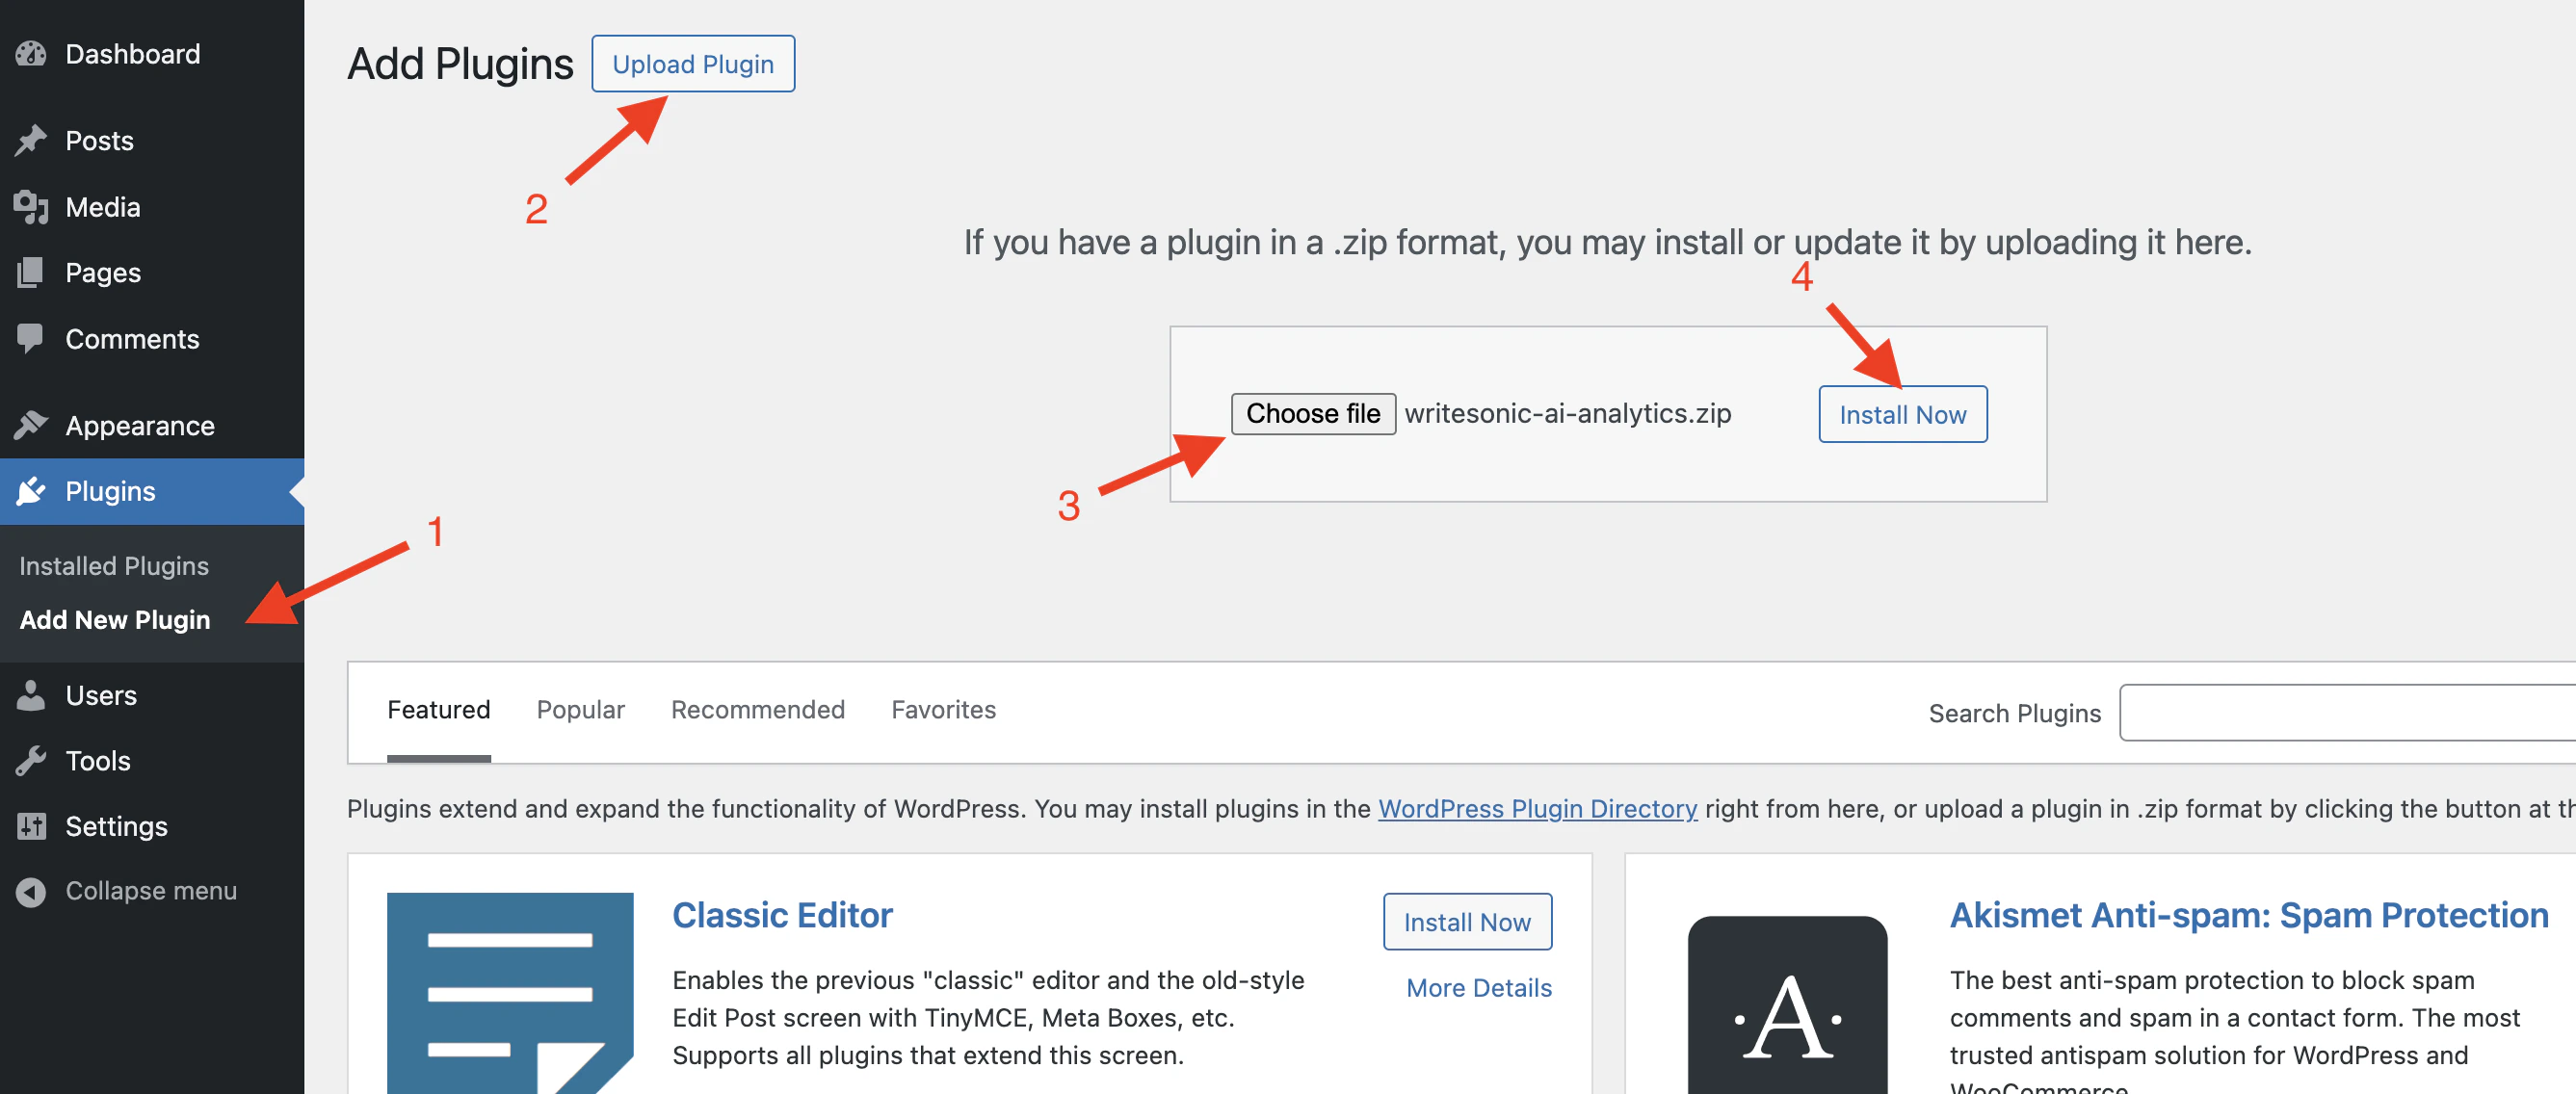
- Log in to your Wordpress admin dashboard
- Navigate to Plugins > Add New Plugin > Upload Plugin
-
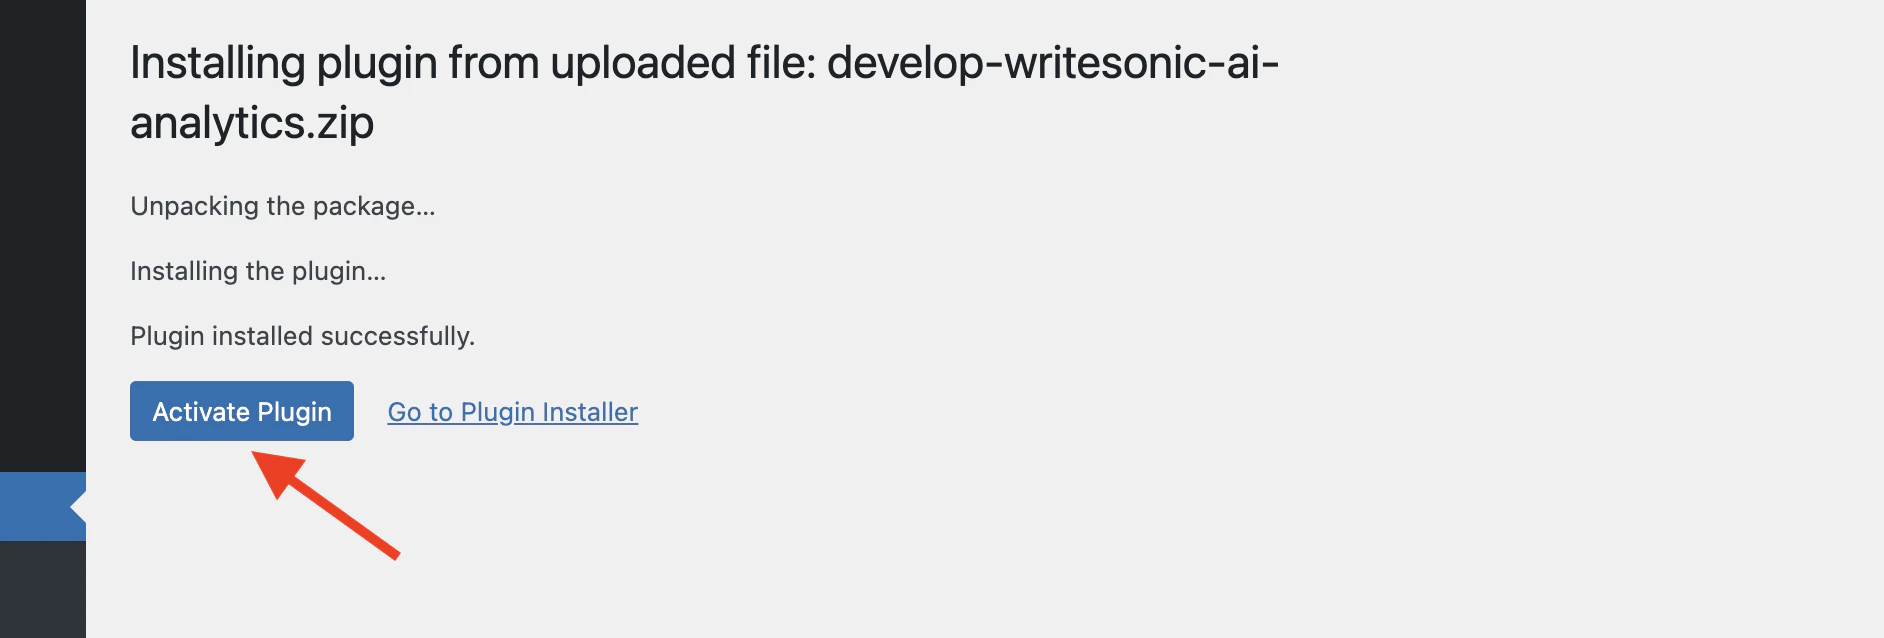
Choose the downloaded ZIP file (writesonic-analytics.zip) and click “Install Now”
-
After installation completes, click “Activate Plugin”
Configure the Plugin
-
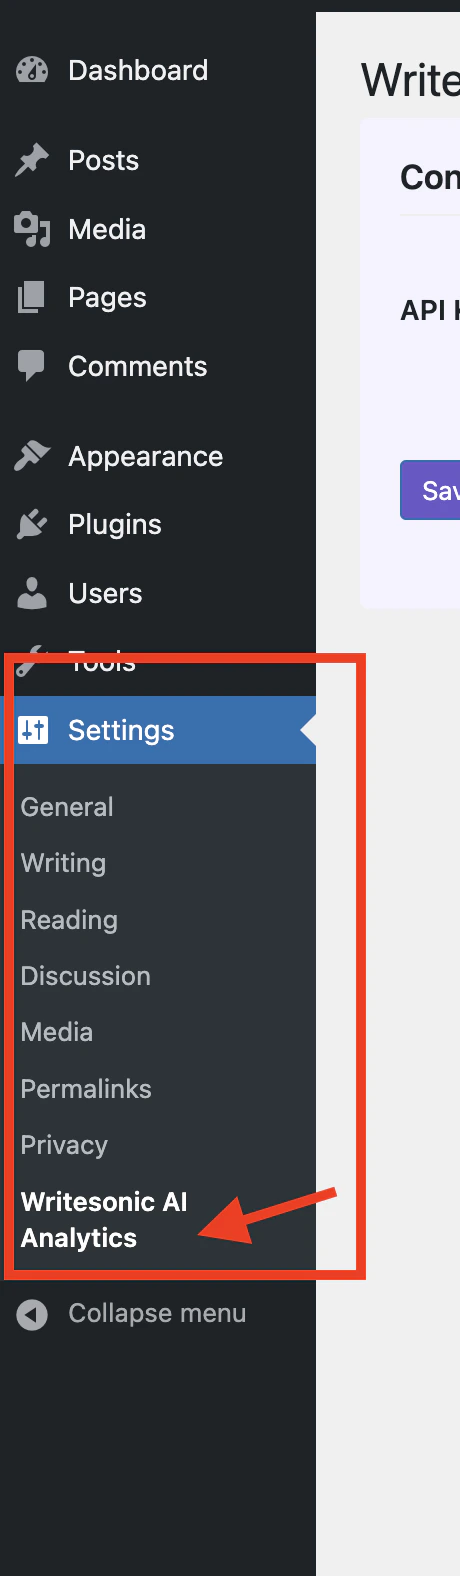
Once activated, navigate to Settings > “Writesonic AI Analytics” in your WordPress admin menu
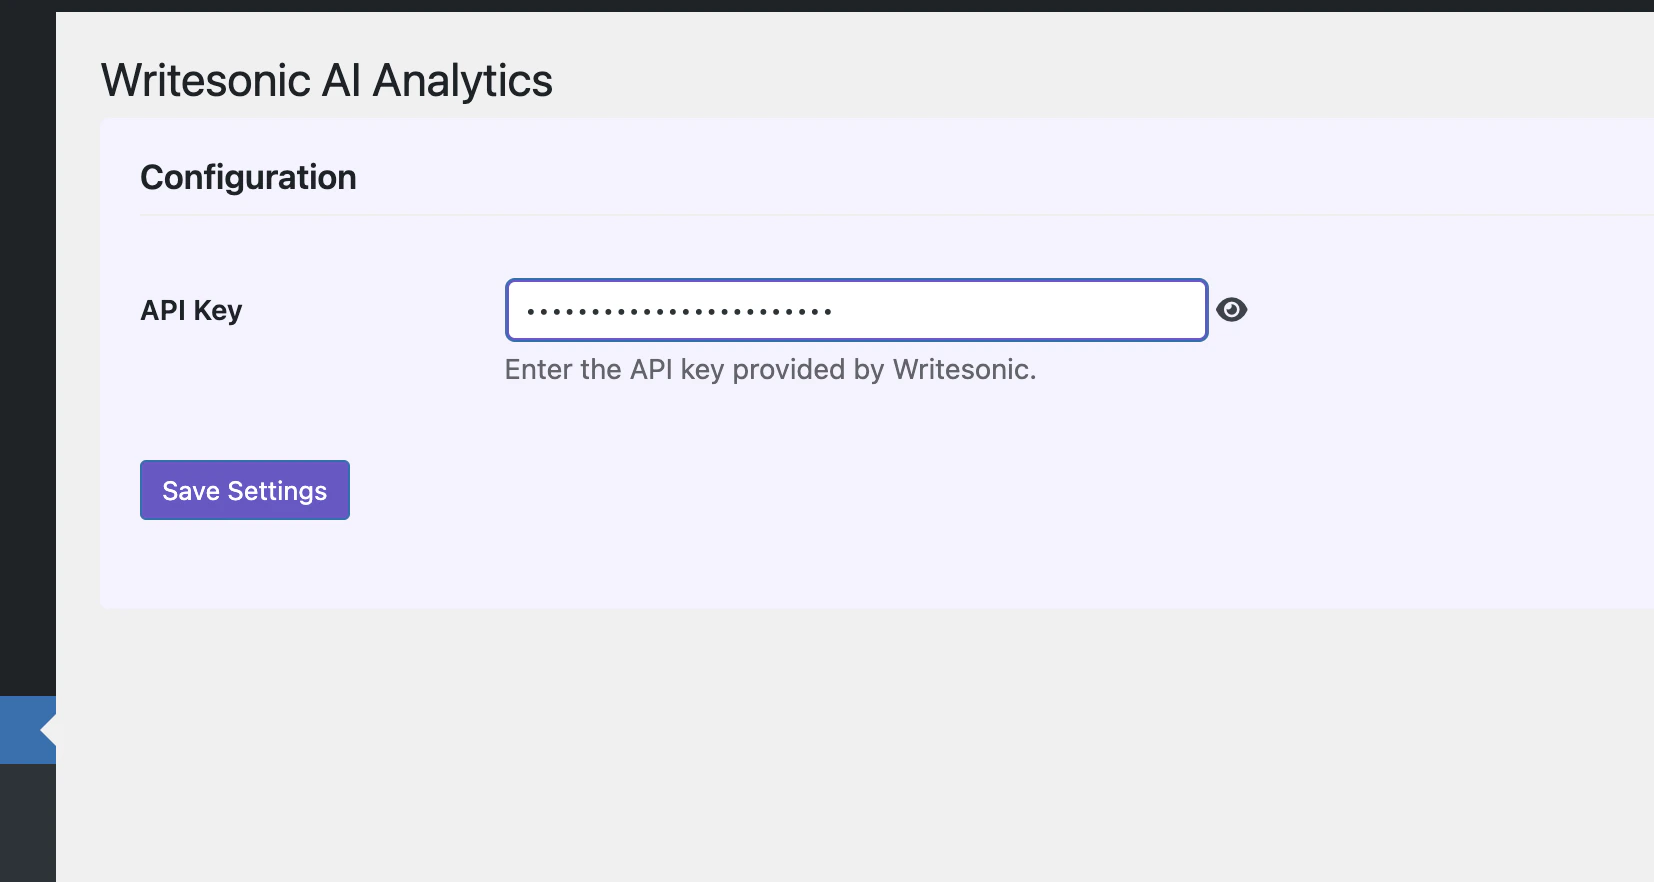
- On the settings page, enter the API Key that was provided in Phase 1
-
Click “Save Settings” to store your configuration
Verify Installation in Writesonic
- Return to Writesonic (the page you kept open from Phase 1)
-
Click on “Verify Connection” to confirm that your Wordpress site is properly connected
- Once verified, you’ll be redirected to your analytics dashboard. The process typically finishes in 1–2 minutes but may take up to 5 minutes.
Troubleshooting
If you encounter any issues during setup:- Ensure your API key is entered correctly
- Verify that your Wordpress site is publicly accessible
- Check that the plugin is activated
- If you have cloudflare setup which is routing traffic to your Wordpress, make sure that it is not overwriting the original request headers
- For assistance, contact [email protected]
Uninstalling
If you need to remove the plugin:- Navigate to Plugins in your Wordpress admin
- Deactivate the Writesonic AI Analytics plugin
- Click “Delete” to completely remove it
Integrating With Cloudflare Integrating with Vercel Log Drains