> ## Documentation Index
> Fetch the complete documentation index at: https://apidocs.writesonic.com/llms.txt
> Use this file to discover all available pages before exploring further.
# Integrating With Cloudflare
## Prerequisites
* An active Writesonic account
* Admin access to your Cloudflare website
* Your website must be using Cloudflare (if you're not, see alternative options below)
### Phase 1: Start in Writesonic
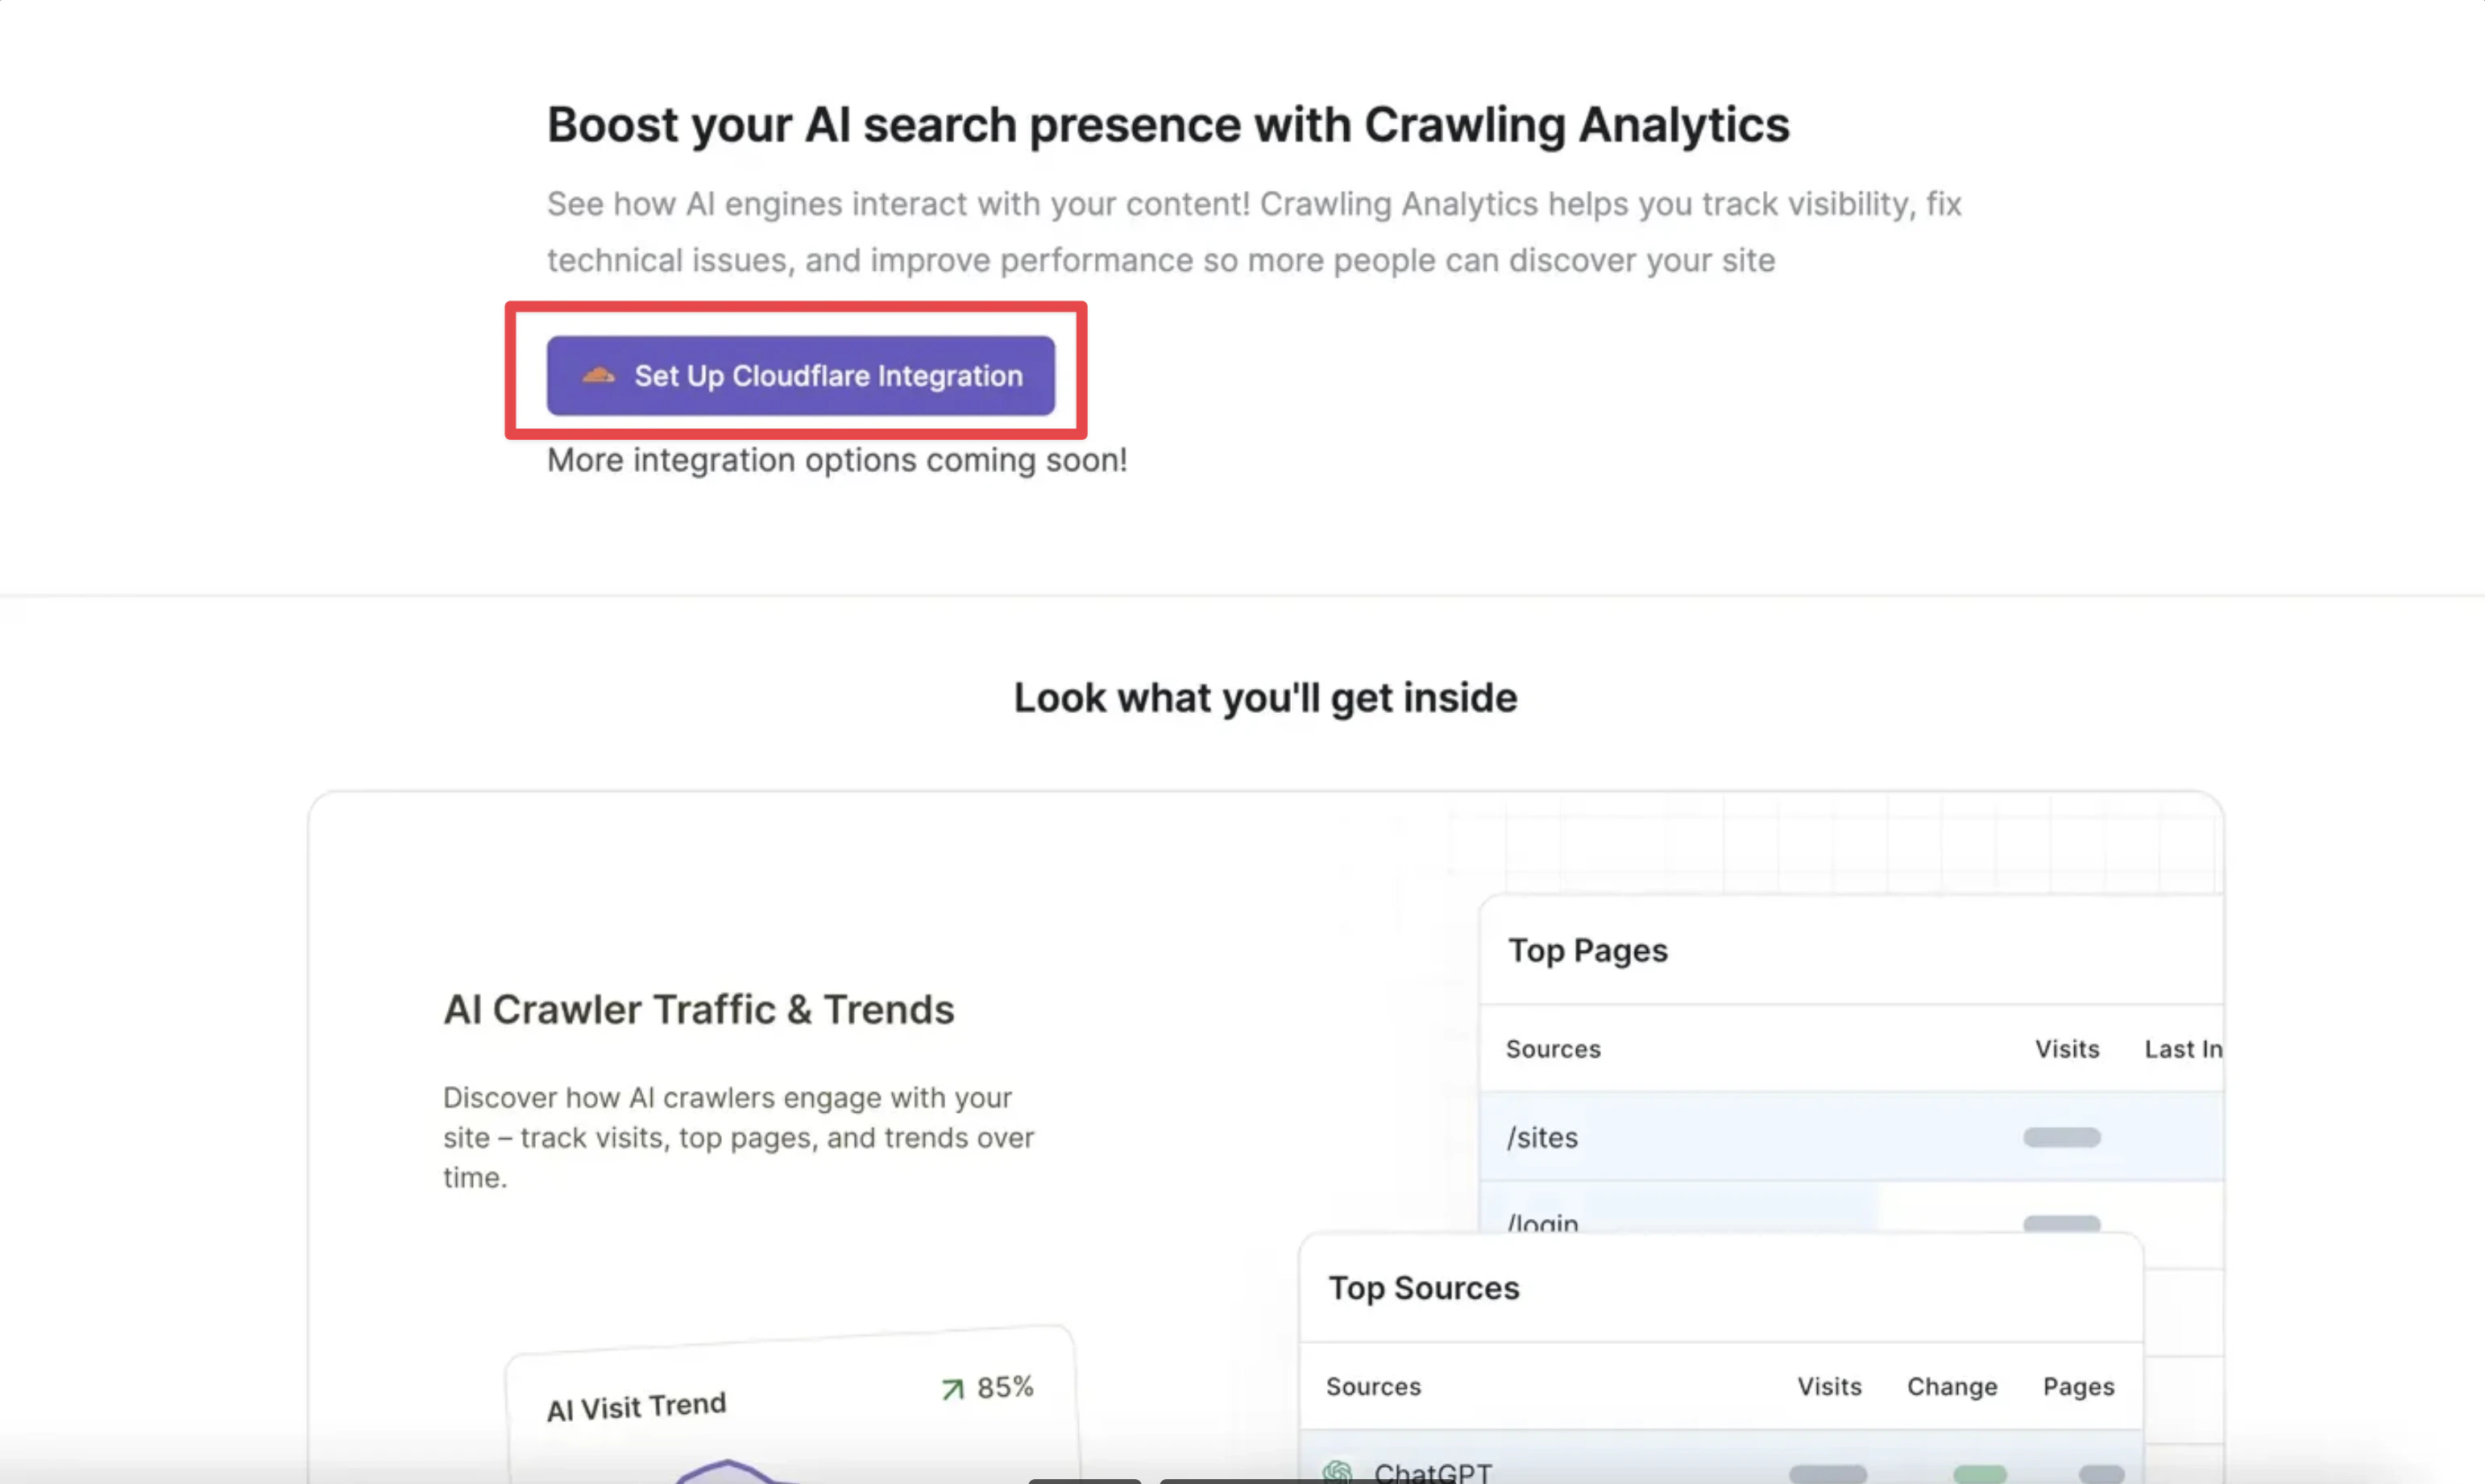
1. Head over to the [AI Traffic Analytics page](https://app.writesonic.com/geo/ai-traffic-analytics) on Writesonic
2. Click on **"Set Up Cloudflare Integration"**
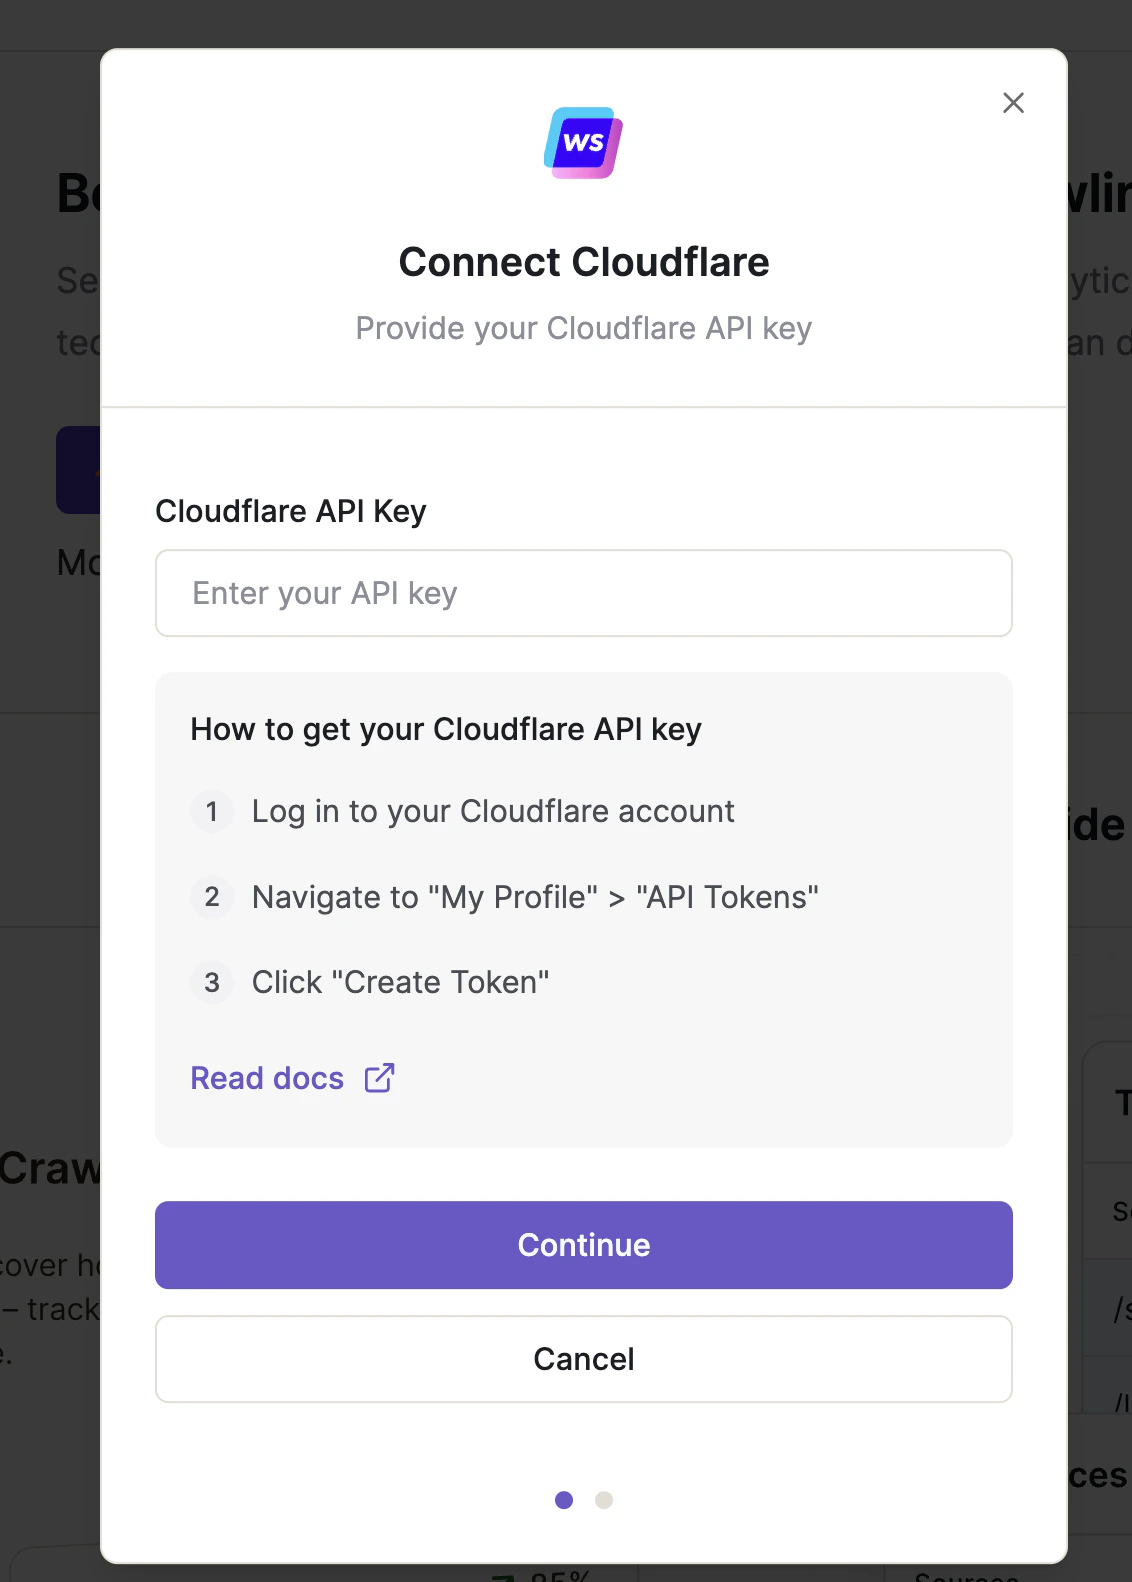
 3. You'll see a modal like this appear on the screen. Now, you need to head over to your Cloudflare account and set up an API key.
 ### Phase 2: Ensure Proper Cloudflare Proxy Settings
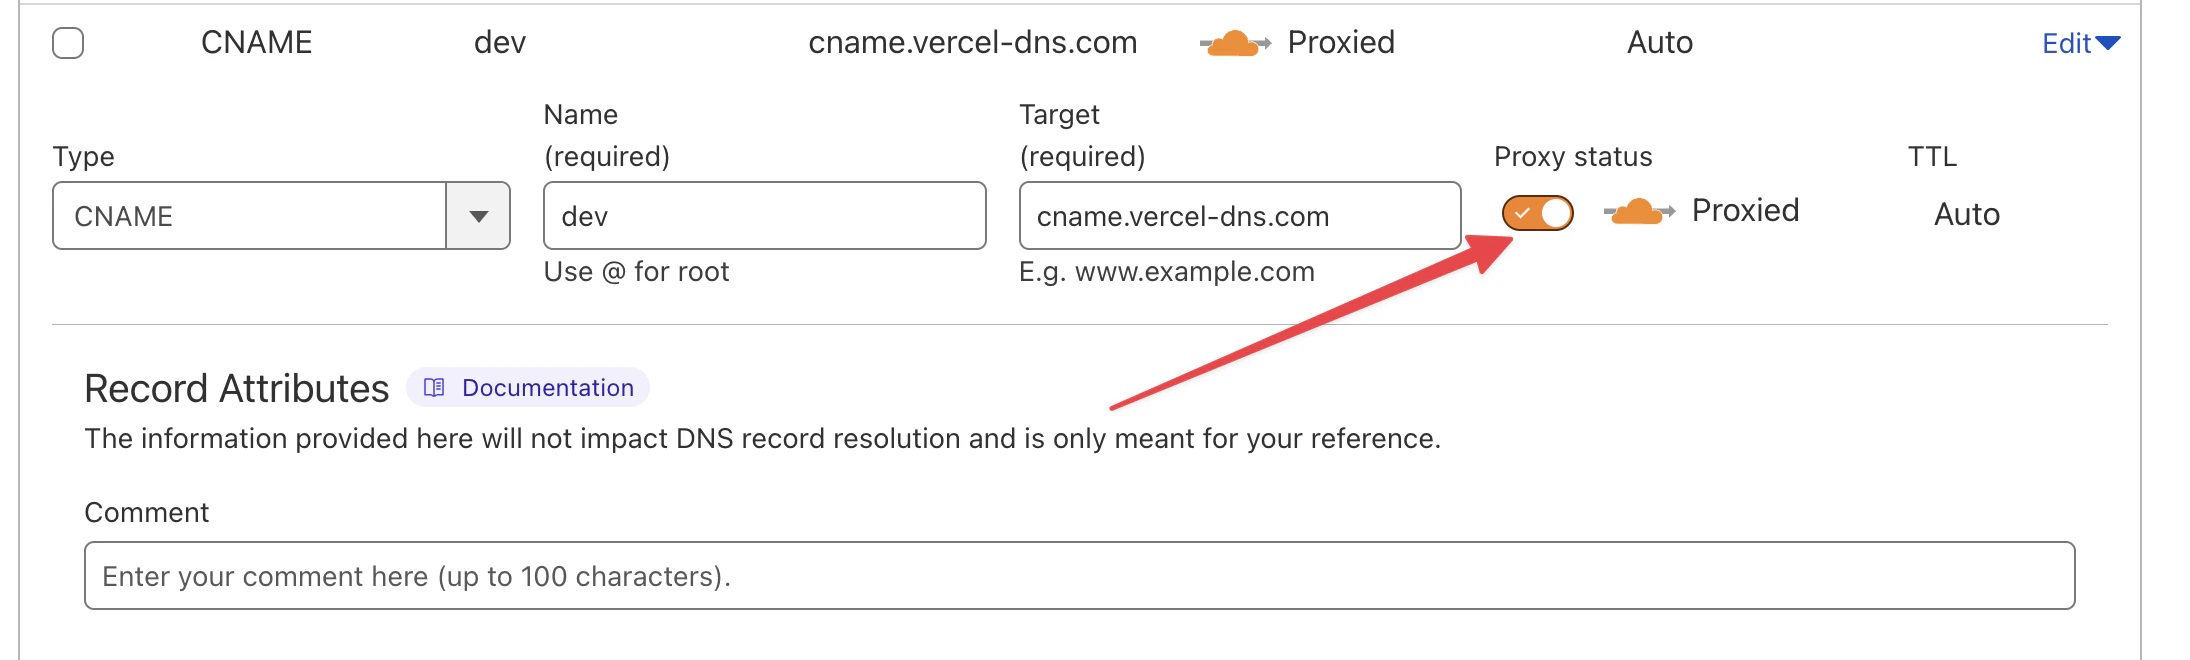
In your Cloudflare DNS settings, ensure the orange cloud icon is turned ON for your domain records (indicating "Proxied" status).
For AI Traffic Analytics to work properly, the orange cloud proxy toggle must be enabled as shown in the image below. This allows Cloudflare to properly intercept and record AI crawler traffic.
### Phase 2: Ensure Proper Cloudflare Proxy Settings
In your Cloudflare DNS settings, ensure the orange cloud icon is turned ON for your domain records (indicating "Proxied" status).
For AI Traffic Analytics to work properly, the orange cloud proxy toggle must be enabled as shown in the image below. This allows Cloudflare to properly intercept and record AI crawler traffic.
 ### Phase 3: Create API Token in Cloudflare
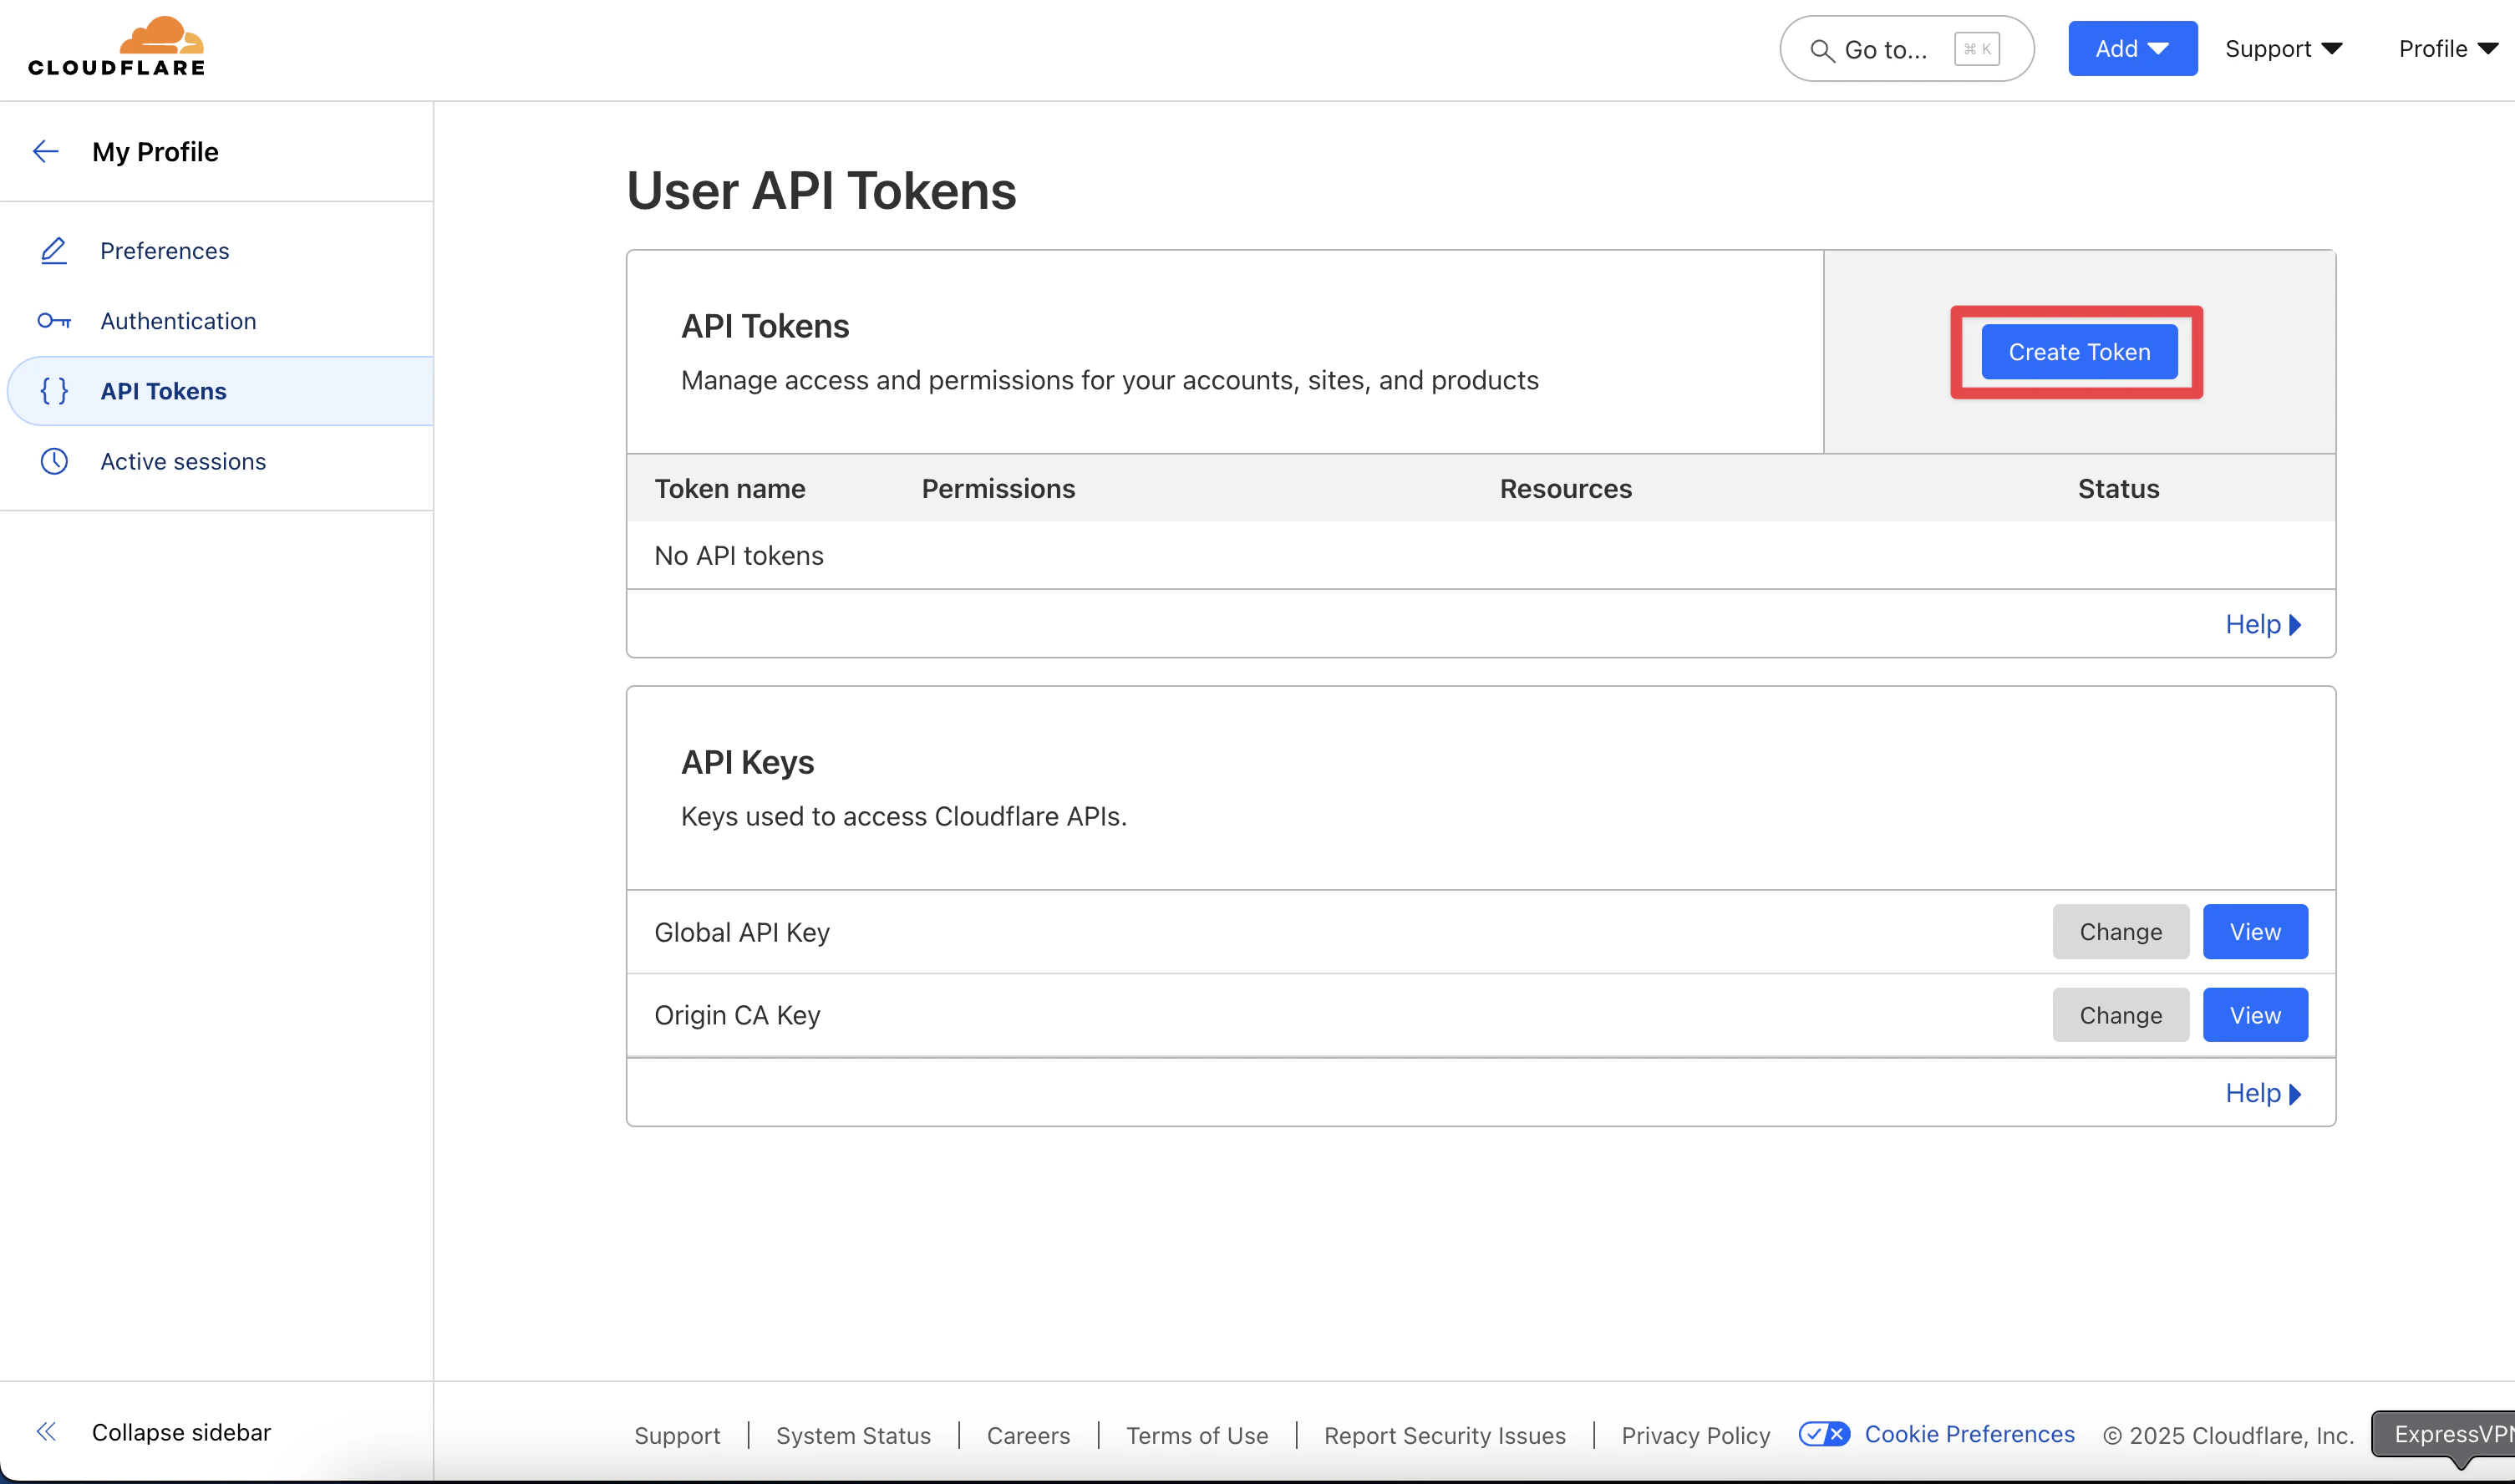
1. Go to the [API Tokens page](https://dash.cloudflare.com/profile/api-tokens) on your Cloudflare dashboard.
2. Click on `Create Token`
### Phase 3: Create API Token in Cloudflare
1. Go to the [API Tokens page](https://dash.cloudflare.com/profile/api-tokens) on your Cloudflare dashboard.
2. Click on `Create Token`
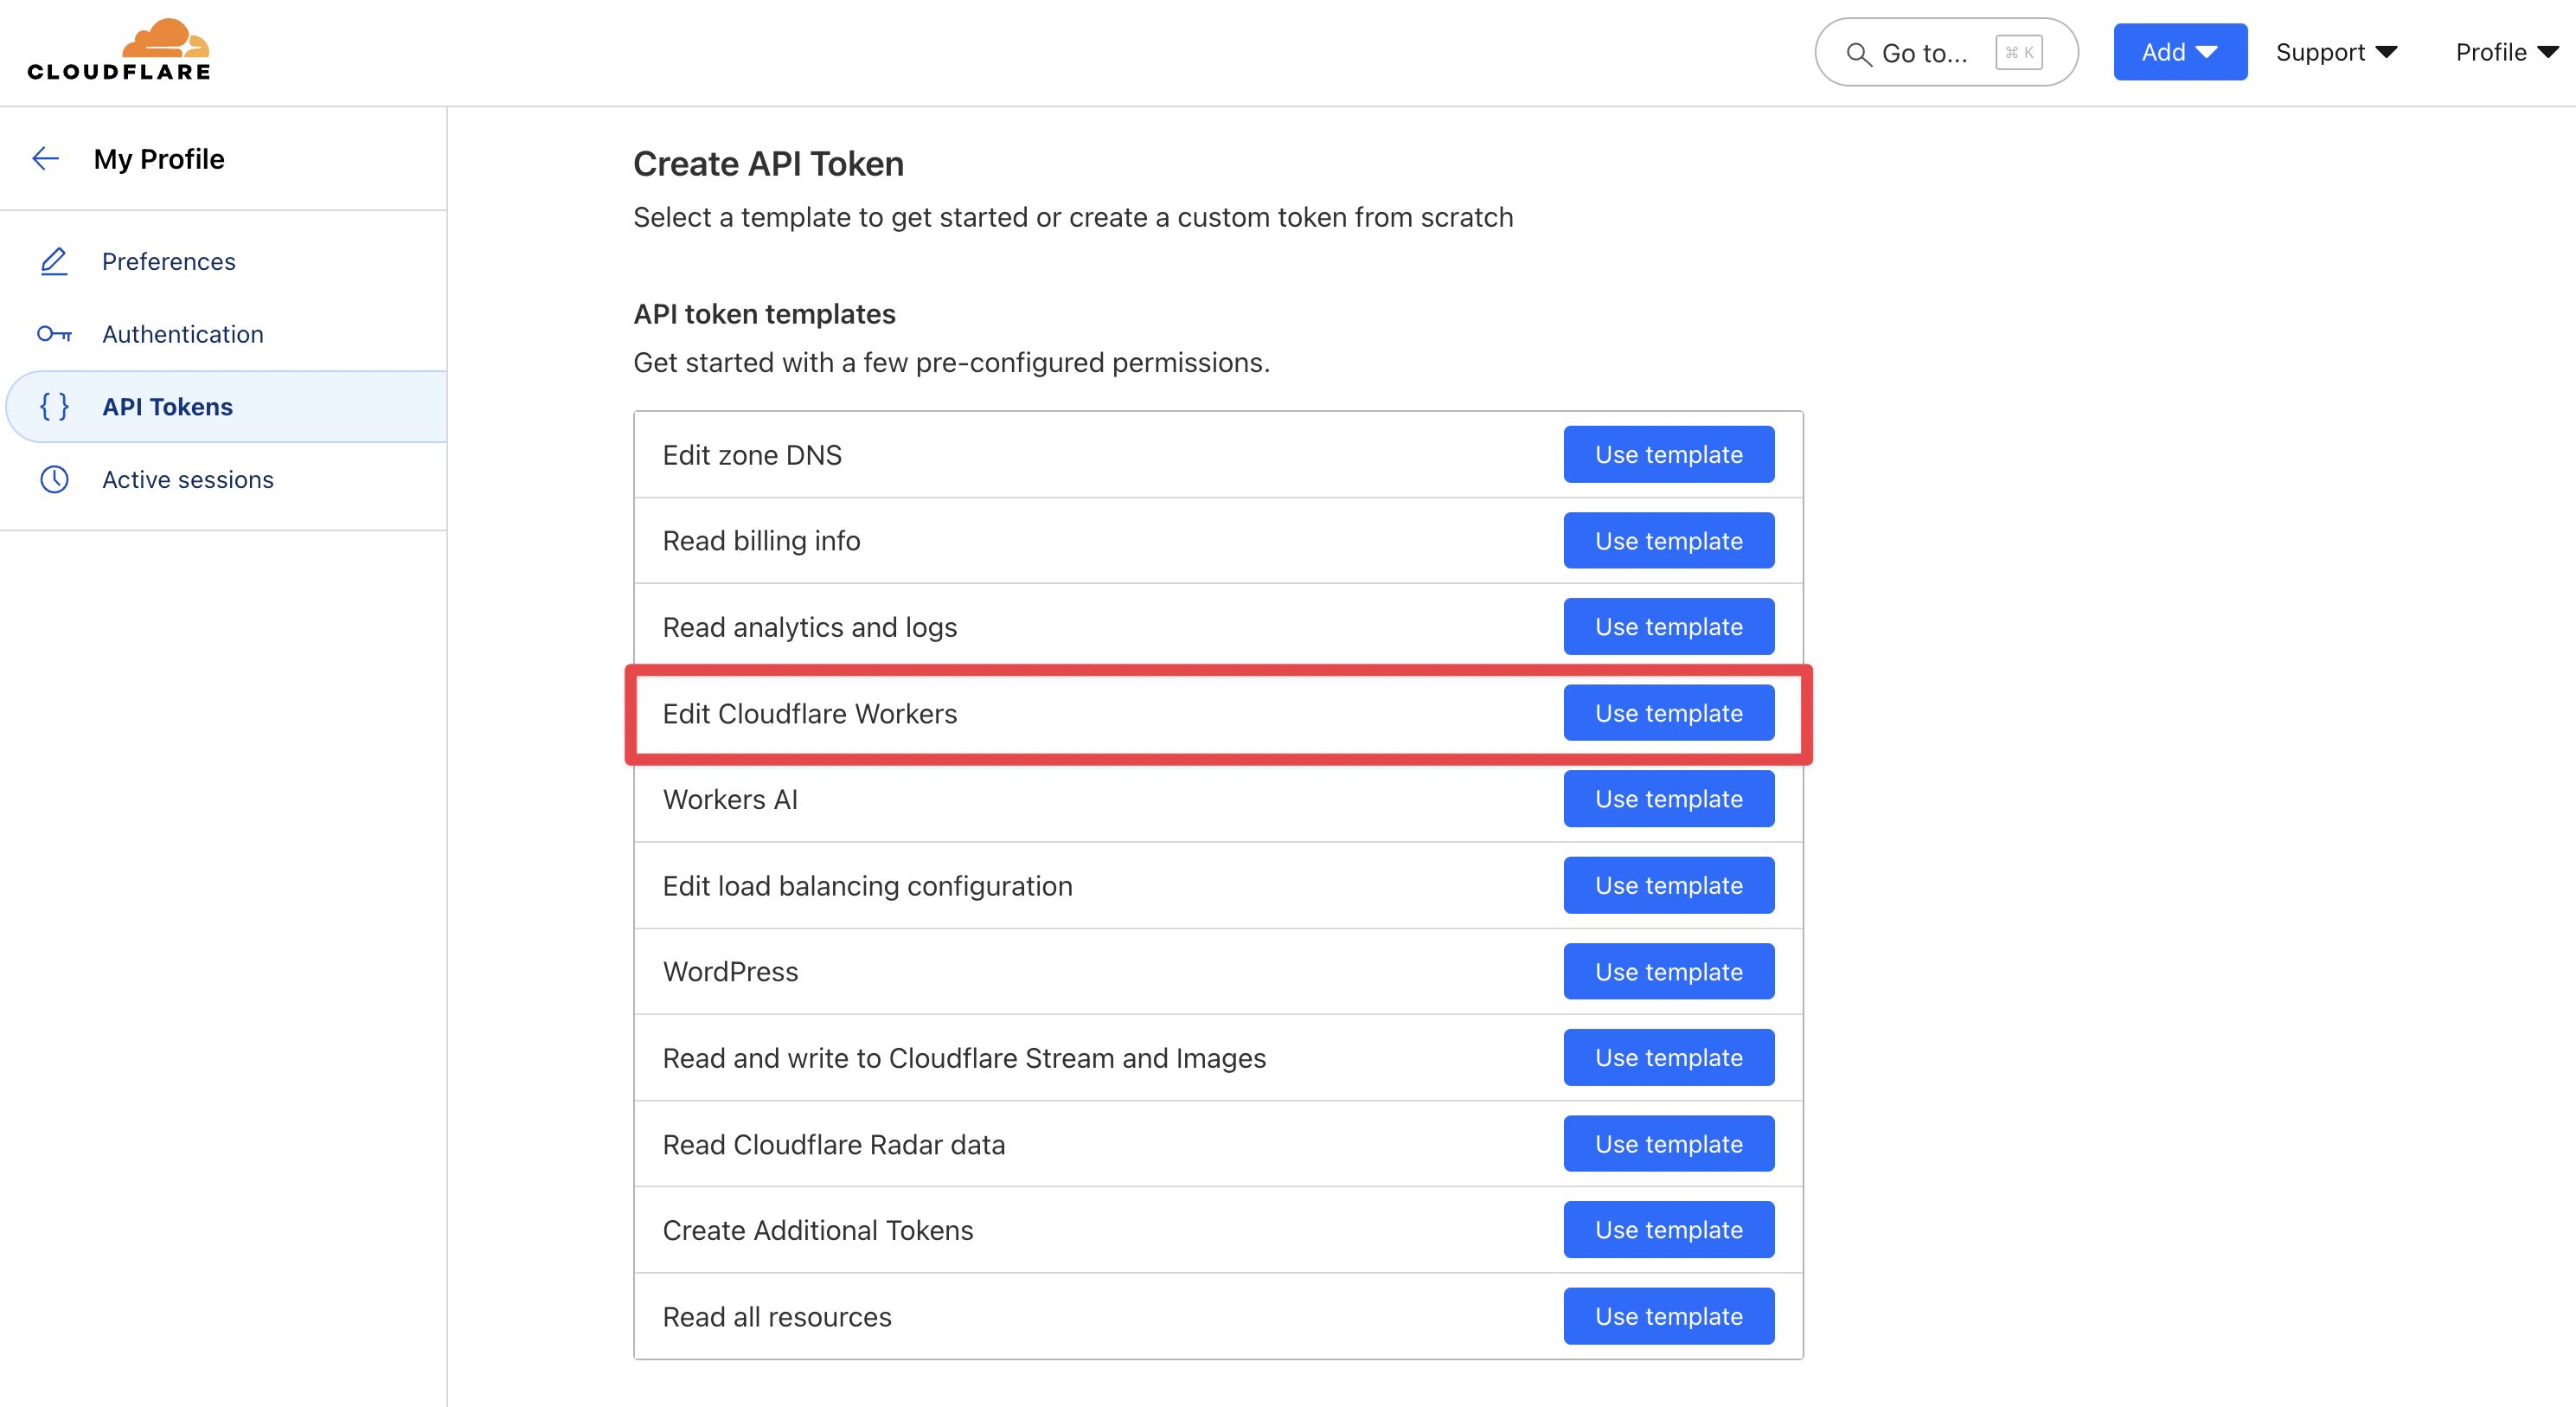
 3. Click the `Use Template` button next to **"Edit Clouldflare Workers"**.
 ### Phase 4: Configure Token Permissions
1. On the next screen, scroll down to "Permissions".
### Phase 4: Configure Token Permissions
1. On the next screen, scroll down to "Permissions".
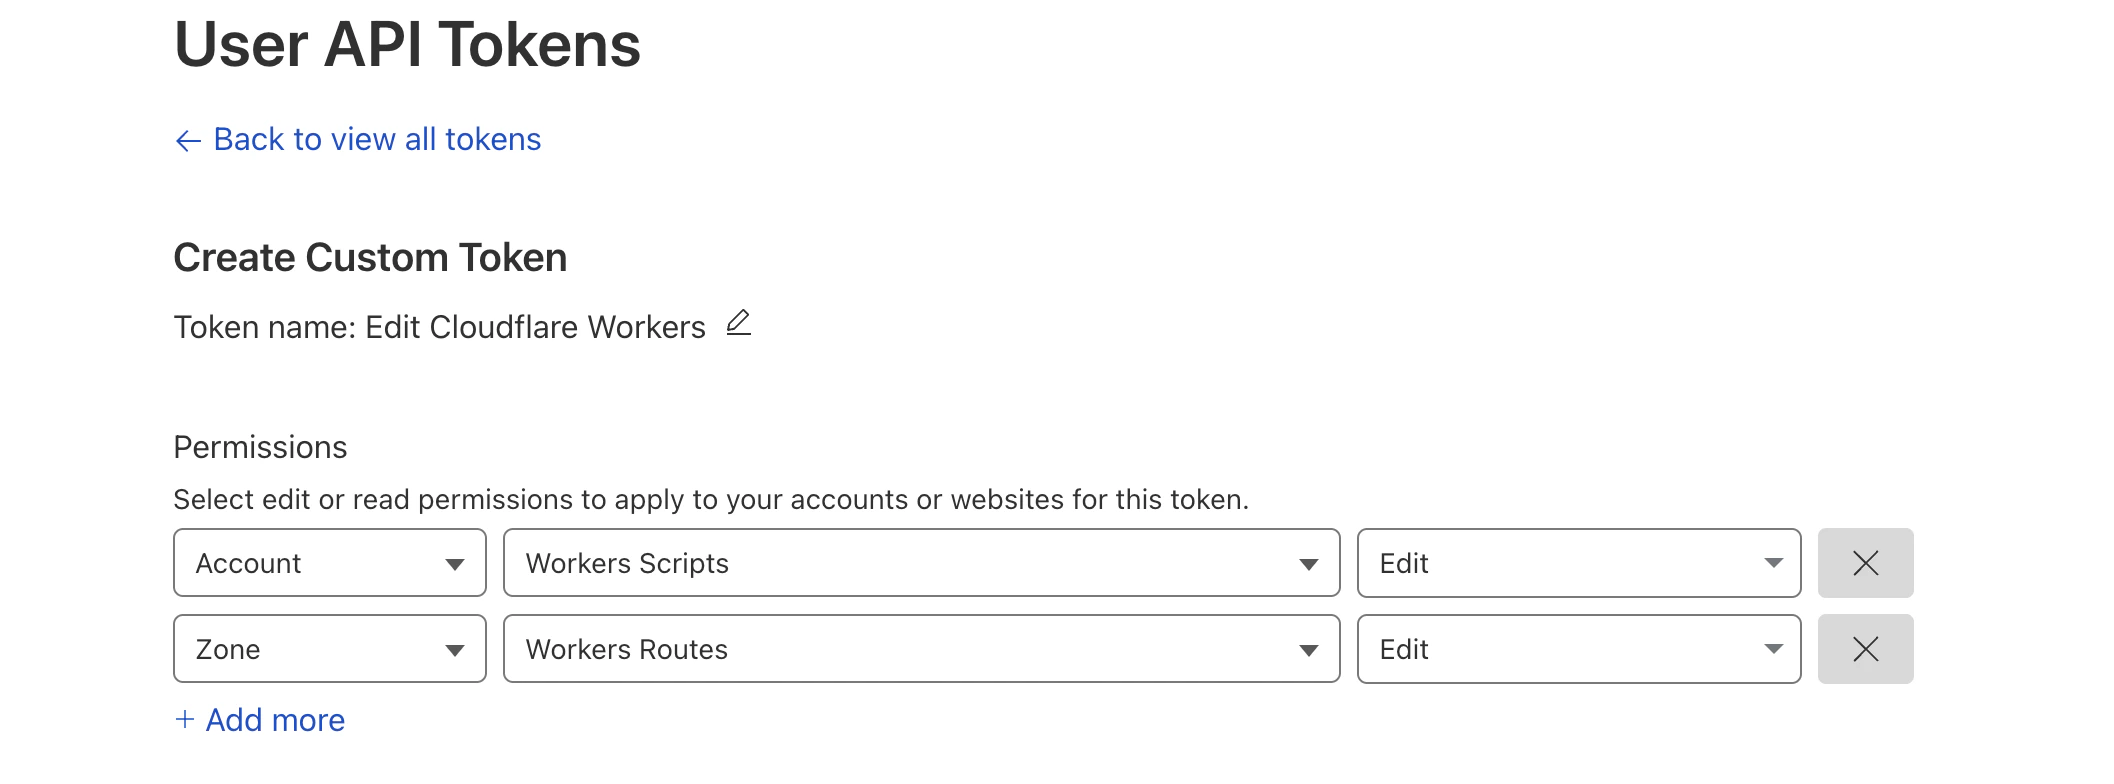
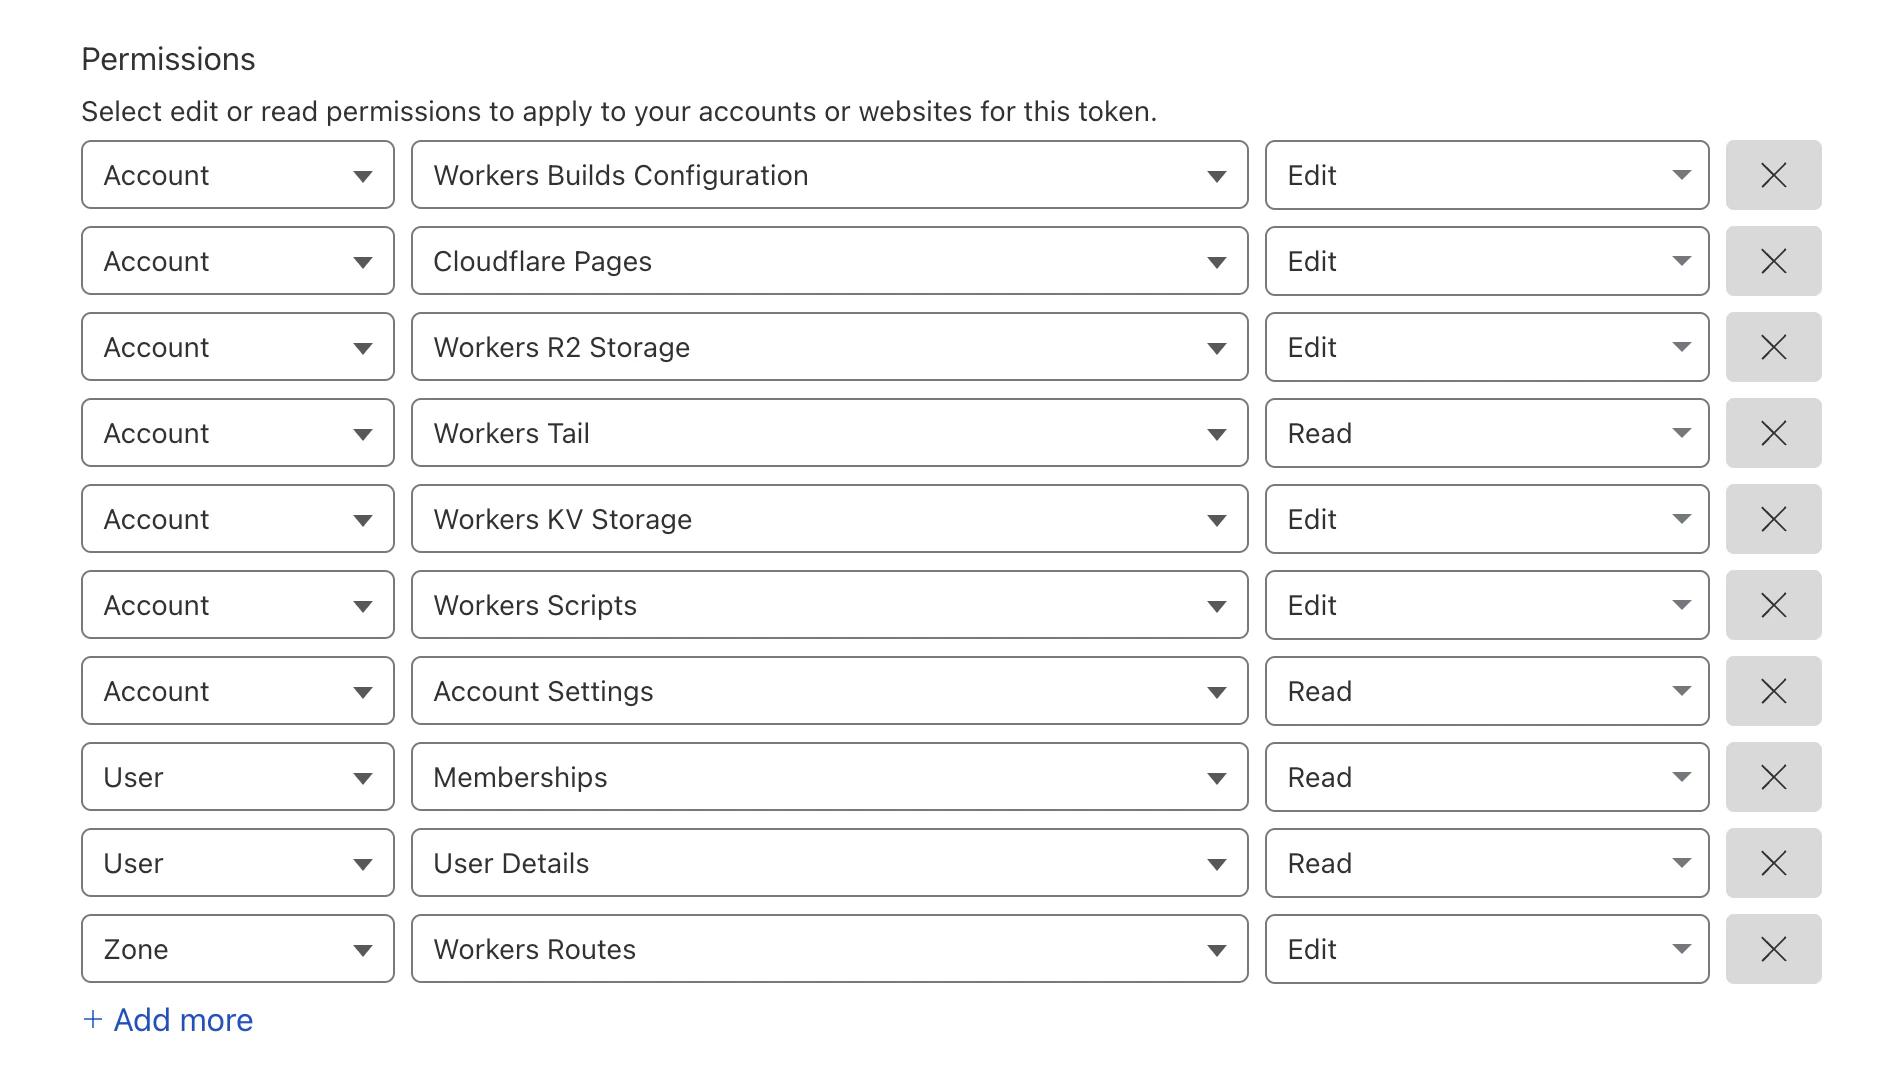 Click on the cross buttons to remove all permissions apart from **"Worker Routes"** and **"Worker Scripts"**. It should look like this:
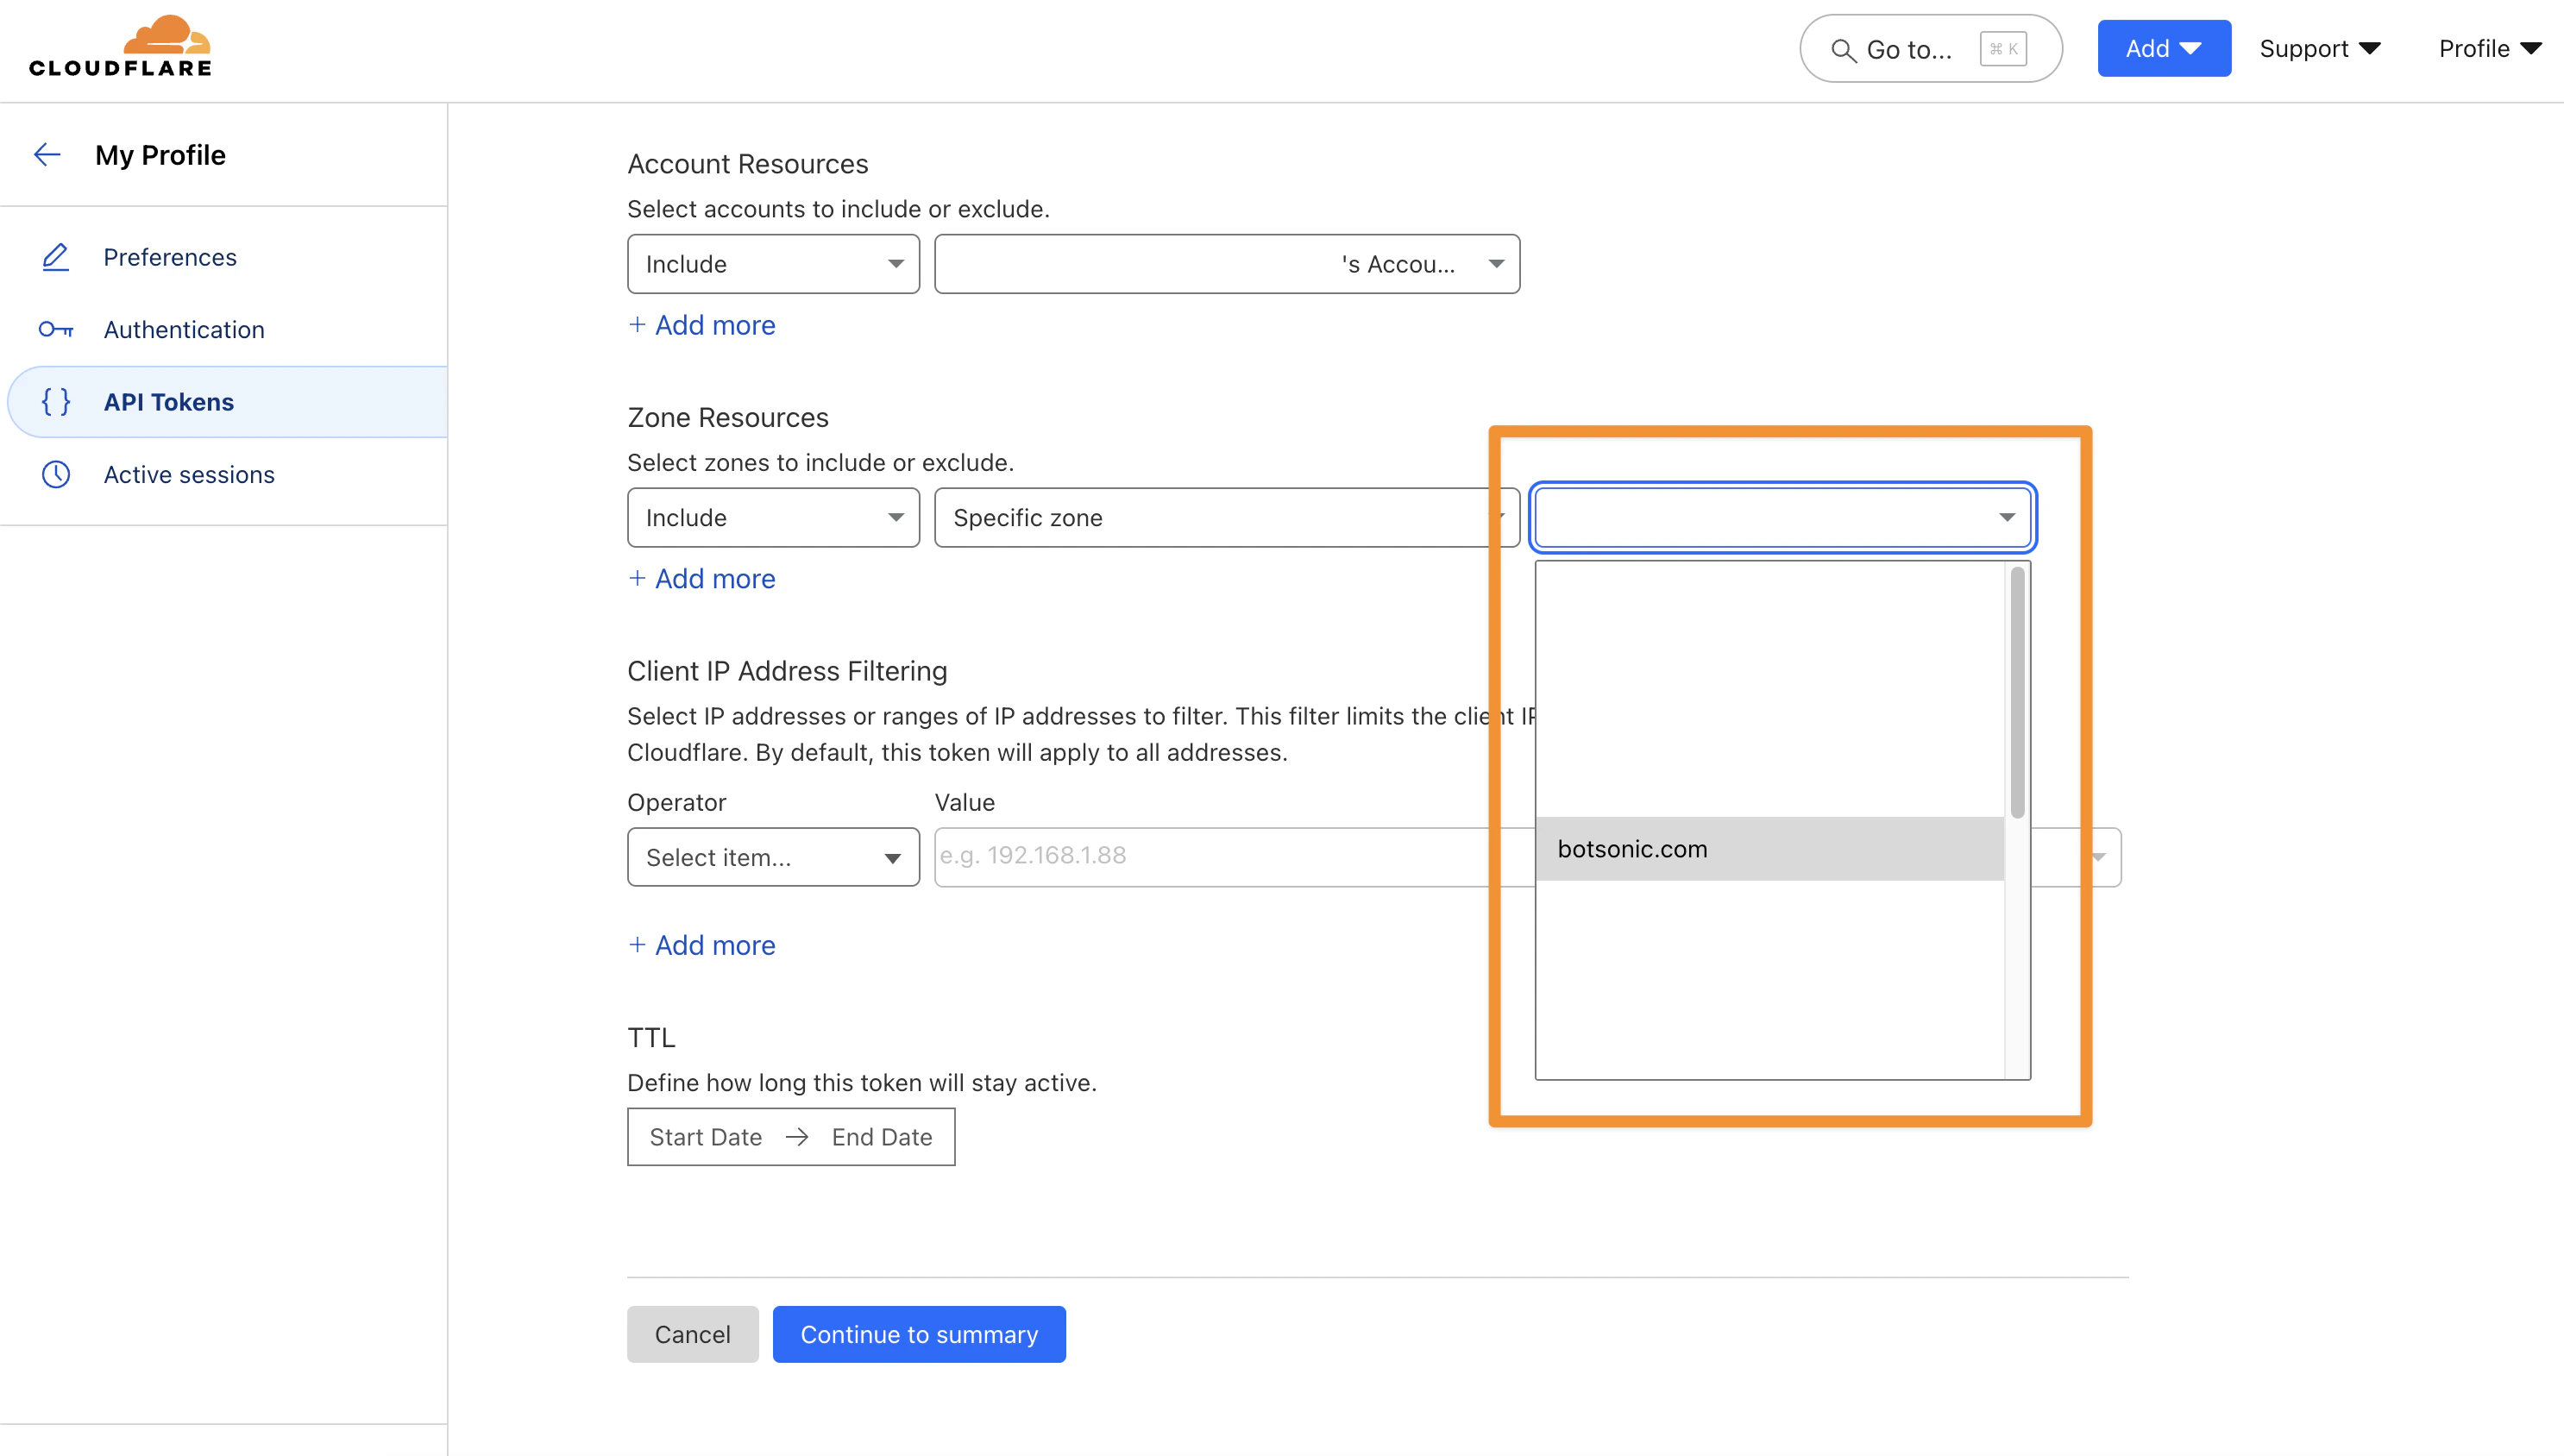
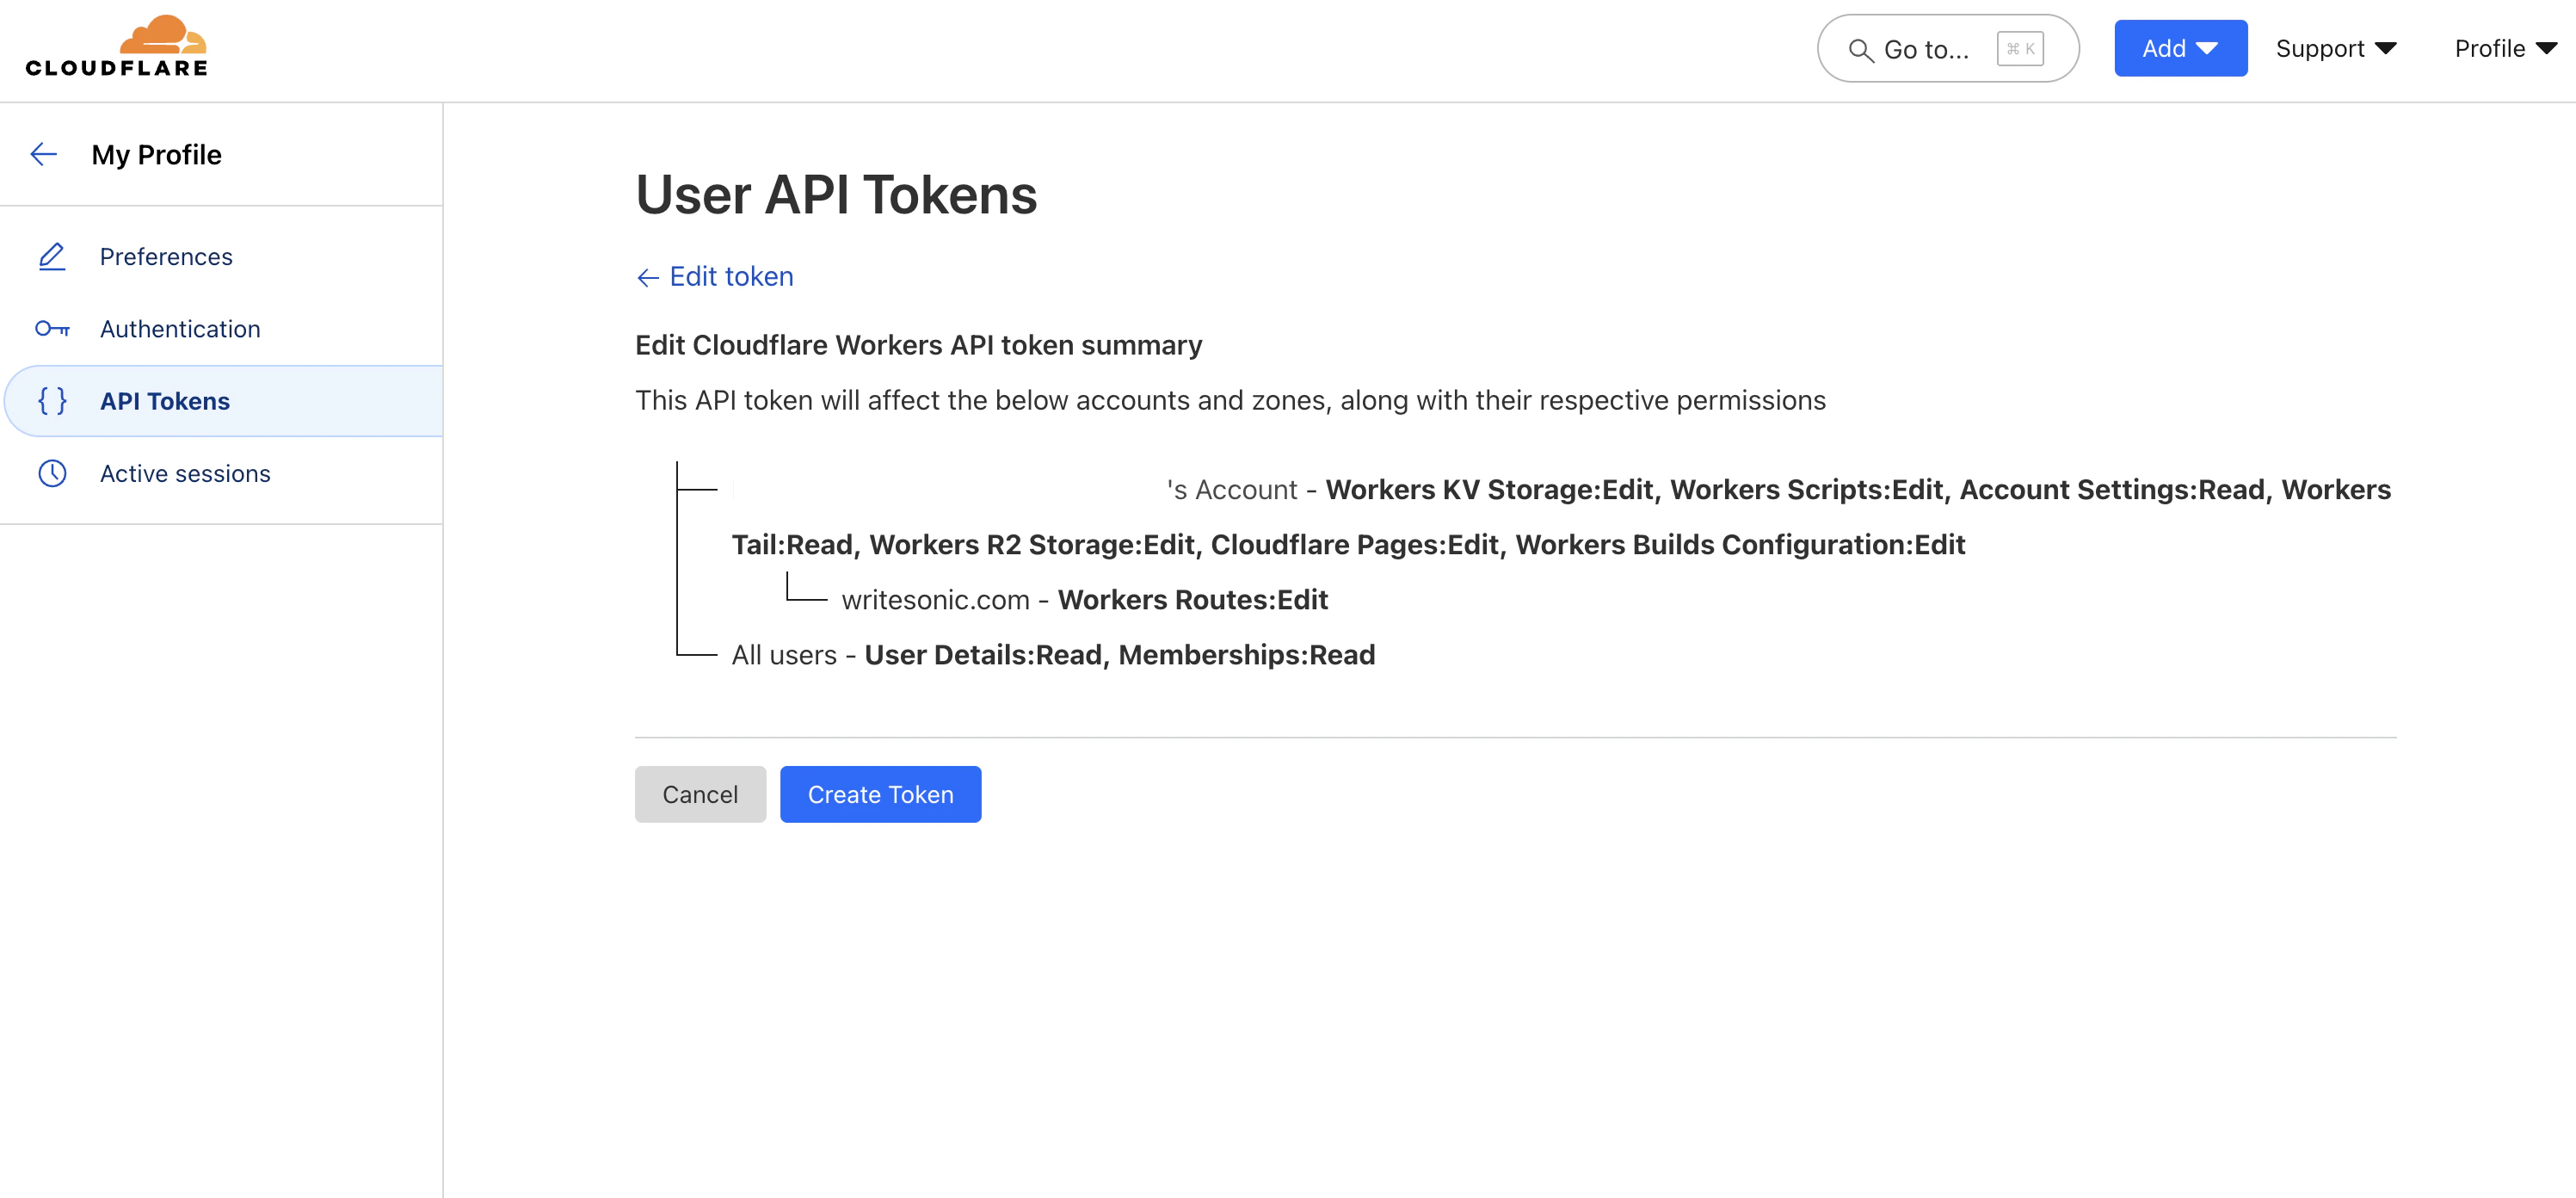
 2. Scroll down and select your Cloudflare account under the **"Account Resources"** dropdown.
 3. Additionally, choose the domain that you would like to install the analytics on from the **"Zone Resources"** dropdown.
 ### Phase 5: Create and Copy Token
1. Click on **"Continue to Summary"**.
2. And then click on **"Create Token"**.
### Phase 5: Create and Copy Token
1. Click on **"Continue to Summary"**.
2. And then click on **"Create Token"**.
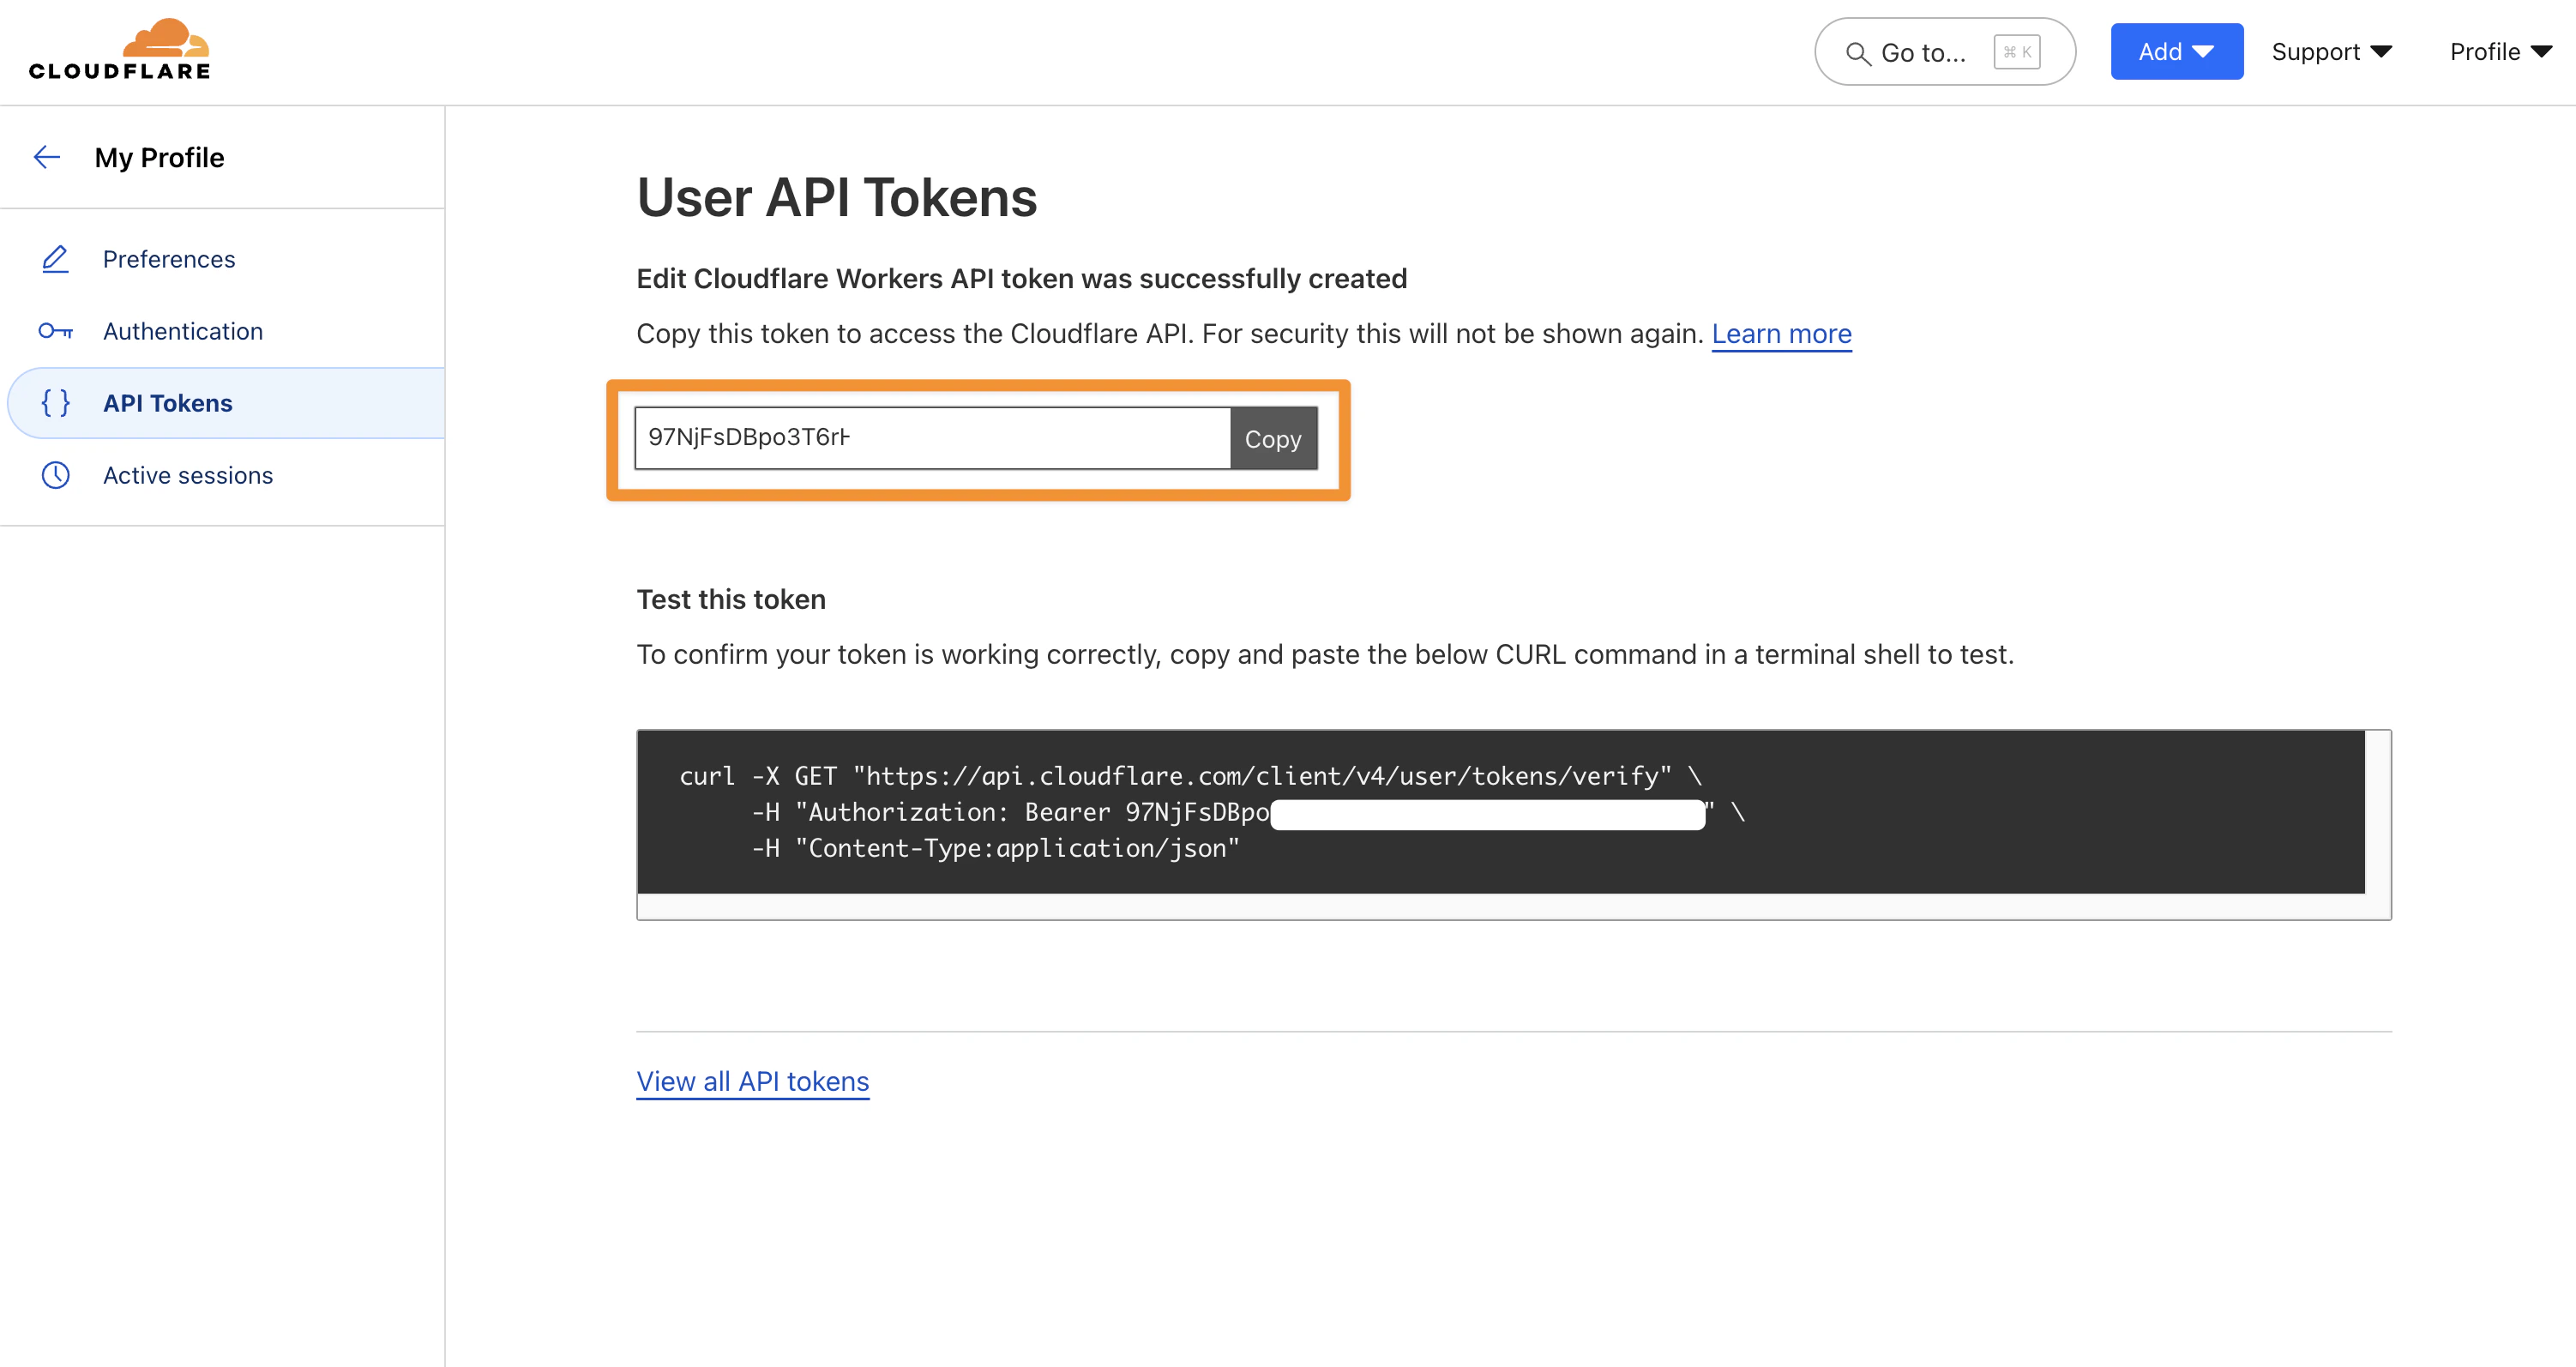
 3. Next, click on the "Copy" button to copy your API token.
 ### Phase 6: Complete Setup in Writesonic
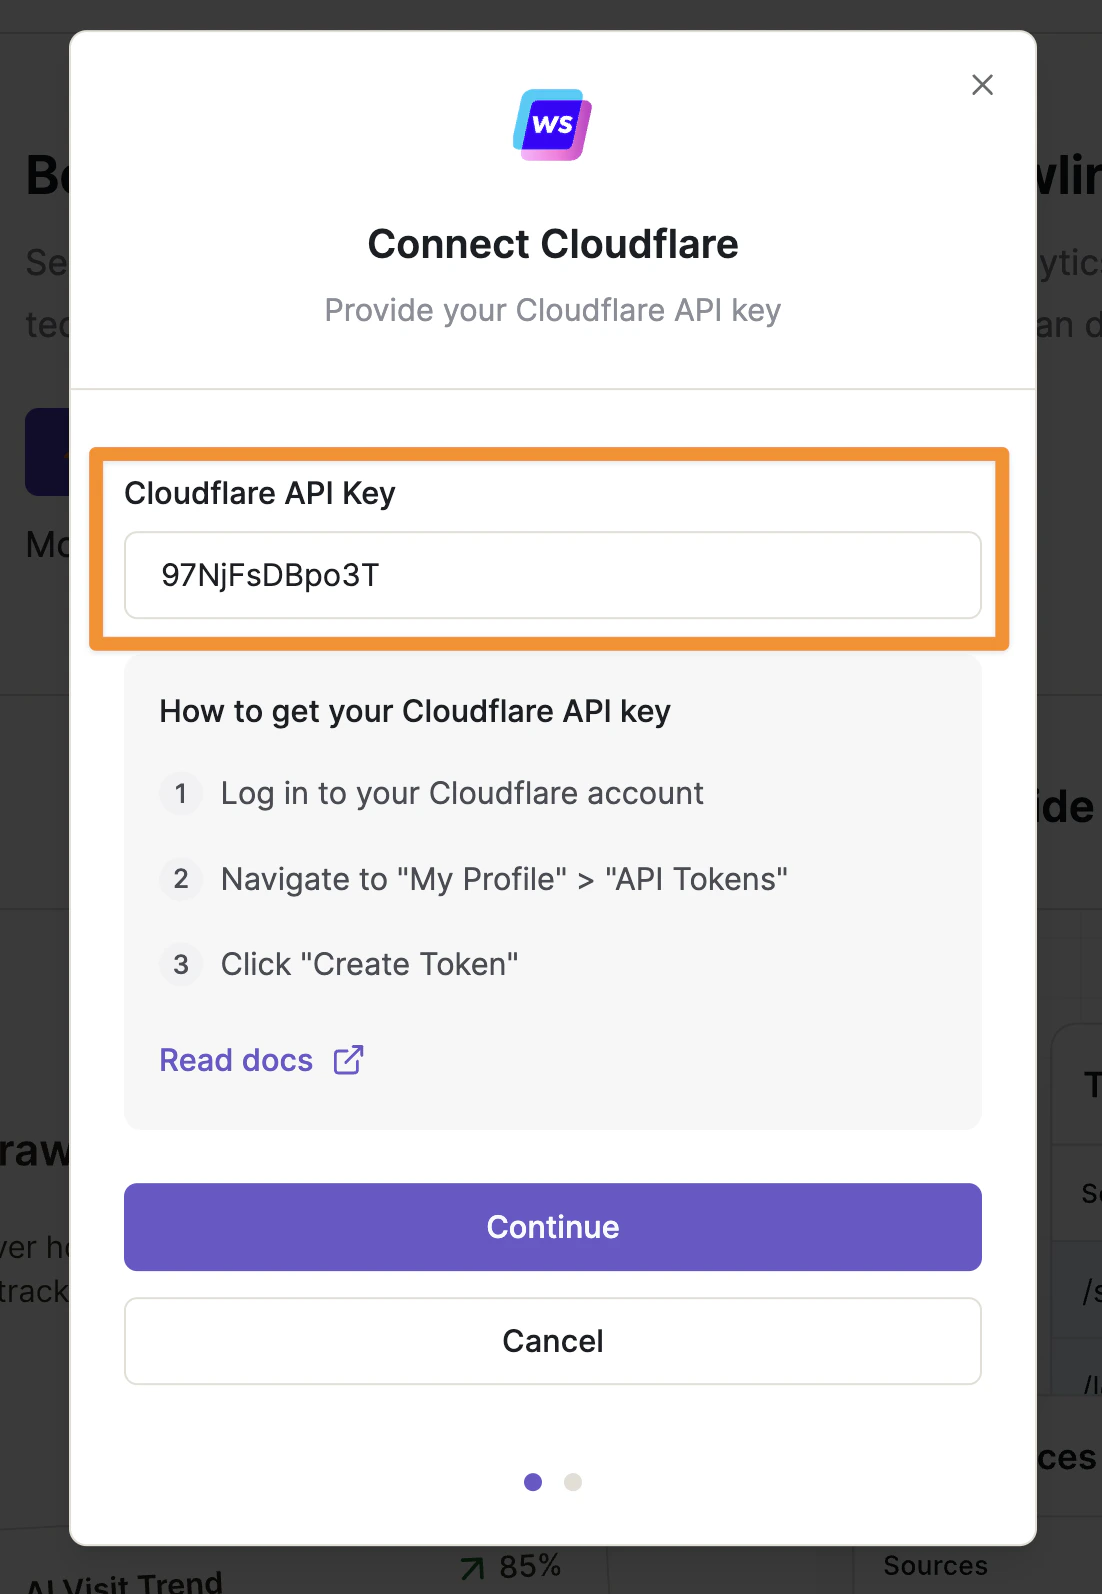
1. Now, go back to Writesonic. Enter your copied API token and click on **"Continue"**.
### Phase 6: Complete Setup in Writesonic
1. Now, go back to Writesonic. Enter your copied API token and click on **"Continue"**.
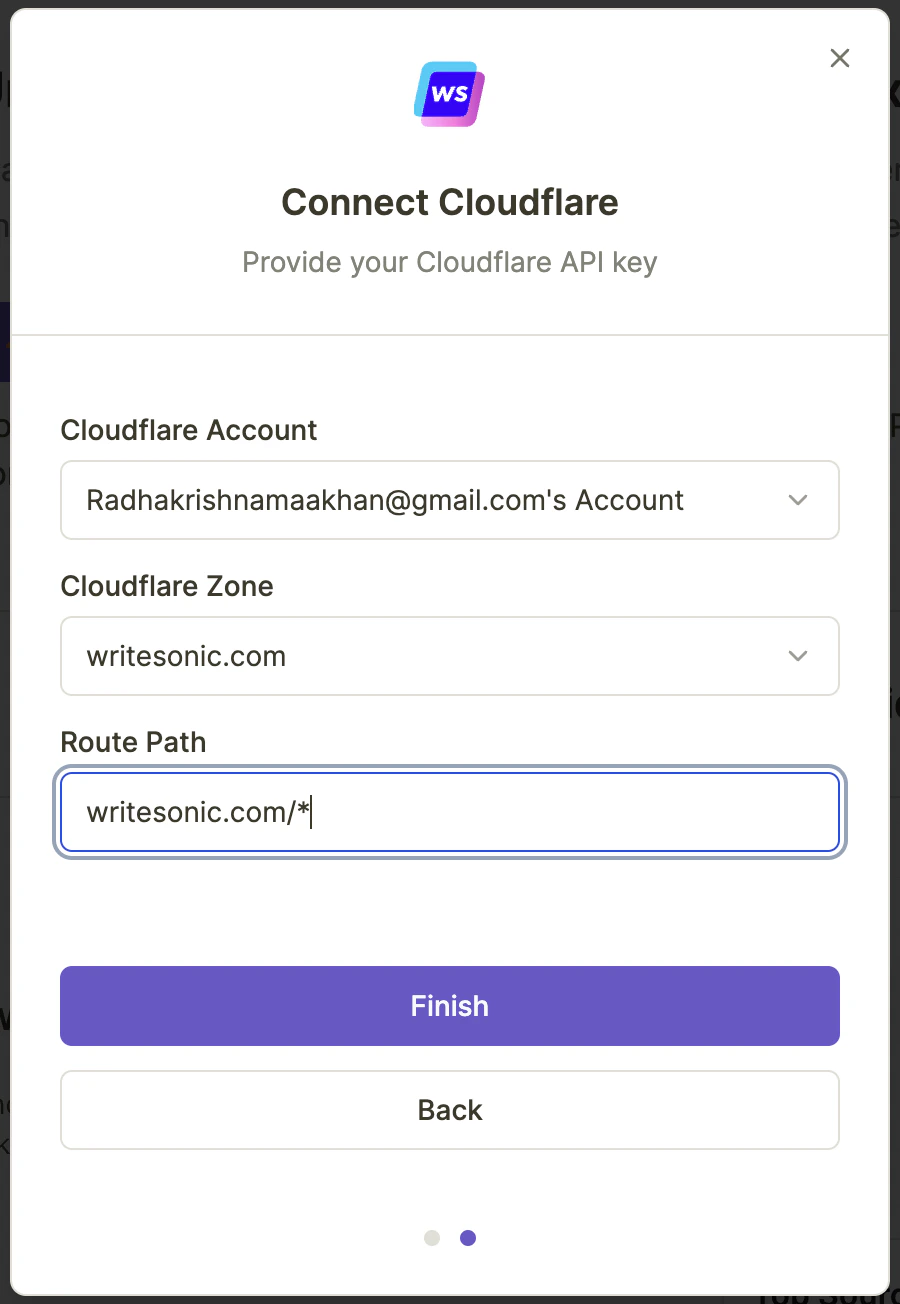
 2. On the next screen, some of the values should be prefilled.
Make sure that:
1. the correct account is showing under Cloudflare Account.
2. Correct domain is selected under Cloudflare Zone.
3. Route Path should be `(subdomain).example.com/*` if your Cloudflare Zone is `example.com`.
> **NOTE:** **The wildcard character is not allowed in the subdomain.** **Adding a subdomain is optional.**
2. On the next screen, some of the values should be prefilled.
Make sure that:
1. the correct account is showing under Cloudflare Account.
2. Correct domain is selected under Cloudflare Zone.
3. Route Path should be `(subdomain).example.com/*` if your Cloudflare Zone is `example.com`.
> **NOTE:** **The wildcard character is not allowed in the subdomain.** **Adding a subdomain is optional.**
 3. Click on the Finish button and your Analytics should be deployed in a couple of seconds.
 ### Verify Installation
To test if the Analytics has been set up properly, go to ChatGPT and with **GPT-4o** model selected with "Search" enabled, try running a query like:
```
Research and tell me about yourwebsite.com.
```
where `yourwebsite.com` should be replaced with your website domain.
Now, go back to Writesonic and you should start seeing the requests on your Analytics.
## Alternative Implementation Methods
Additionally, we support native integrations to Wordpress and Vercel. We are coming up with various other integrations like Shopify, Webflow, Python, Javascript, etc.
## Troubleshooting
If you encounter any issues during setup:
* Ensure your Cloudflare account has the correct permissions
* Check that your selected domain is active in Cloudflare
* Verify that no conflicting Workers are running
* For assistance, contact [\[email protected\]](/cdn-cgi/l/email-protection#77040207071805033700051e03120418191e145914181a)
For more detailed debugging, please check out the [Toubleshooting and FAQs](https://docs.writesonic.com/docs/ai-traffic-analytics-troubleshooting-and-faqs#/) page.
***
[Setup and Implementation Guide](/docs/ai-traffic-analytics-setup-and-implementation-guide)
[Integrating with Wordpress](/docs/integrating-with-wordpress)
### Verify Installation
To test if the Analytics has been set up properly, go to ChatGPT and with **GPT-4o** model selected with "Search" enabled, try running a query like:
```
Research and tell me about yourwebsite.com.
```
where `yourwebsite.com` should be replaced with your website domain.
Now, go back to Writesonic and you should start seeing the requests on your Analytics.
## Alternative Implementation Methods
Additionally, we support native integrations to Wordpress and Vercel. We are coming up with various other integrations like Shopify, Webflow, Python, Javascript, etc.
## Troubleshooting
If you encounter any issues during setup:
* Ensure your Cloudflare account has the correct permissions
* Check that your selected domain is active in Cloudflare
* Verify that no conflicting Workers are running
* For assistance, contact [\[email protected\]](/cdn-cgi/l/email-protection#77040207071805033700051e03120418191e145914181a)
For more detailed debugging, please check out the [Toubleshooting and FAQs](https://docs.writesonic.com/docs/ai-traffic-analytics-troubleshooting-and-faqs#/) page.
***
[Setup and Implementation Guide](/docs/ai-traffic-analytics-setup-and-implementation-guide)
[Integrating with Wordpress](/docs/integrating-with-wordpress)