> ## Documentation Index
> Fetch the complete documentation index at: https://apidocs.writesonic.com/llms.txt
> Use this file to discover all available pages before exploring further.
# Build a playbook
> Describe the workflow and it gets built as a step graph. Then open the editor, fix what's wrong, test it, and publish.
Building an automation usually means placing every step and every connection by hand. Here you describe the procedure and get a working draft, then correct it.
## Describe the process instead of wiring every step
The box on the Playbooks screen reads "Describe the workflow you want to automate." Type the procedure or dictate it, then select **Generate**.
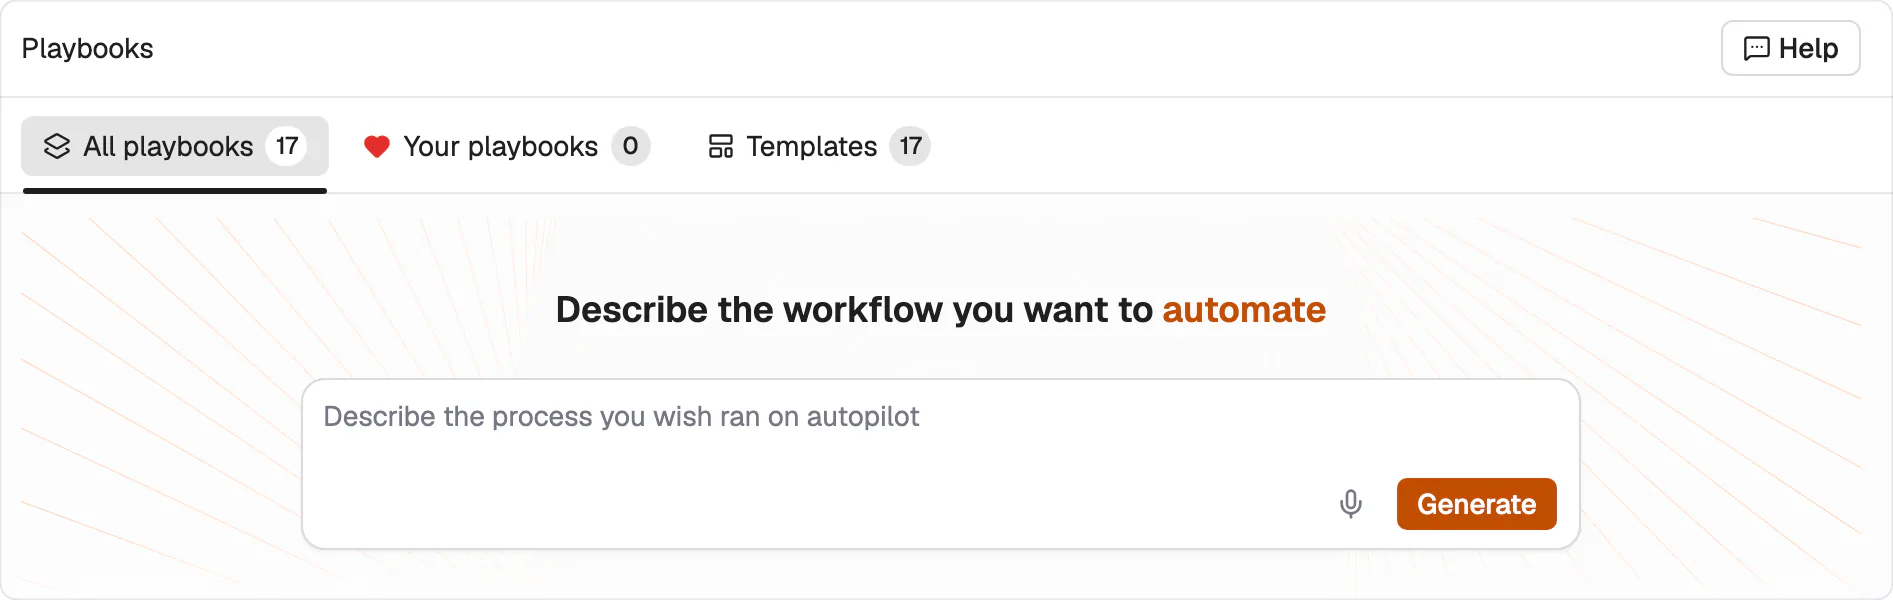 Brief it the way you'd brief a new hire. Name the inputs, put the steps in order, and say what the finished output should be. Include the checks and decisions that belong to your procedure. A vague description produces a vague playbook, the same way a vague task produces generic work.
> Use a page URL as the input. Audit the page for SEO and GEO, then return prioritized recommendations, a title tag, and a meta description.
If your team already has the SOP written down, paste it in. Keep its inputs, sequence, decision points and output requirements intact. That's the shortest path to a playbook that matches how you actually work.
## The editor shows the workflow as a graph
What comes back is a **Draft**, and it opens in the editor.
Brief it the way you'd brief a new hire. Name the inputs, put the steps in order, and say what the finished output should be. Include the checks and decisions that belong to your procedure. A vague description produces a vague playbook, the same way a vague task produces generic work.
> Use a page URL as the input. Audit the page for SEO and GEO, then return prioritized recommendations, a title tag, and a meta description.
If your team already has the SOP written down, paste it in. Keep its inputs, sequence, decision points and output requirements intact. That's the shortest path to a playbook that matches how you actually work.
## The editor shows the workflow as a graph
What comes back is a **Draft**, and it opens in the editor.
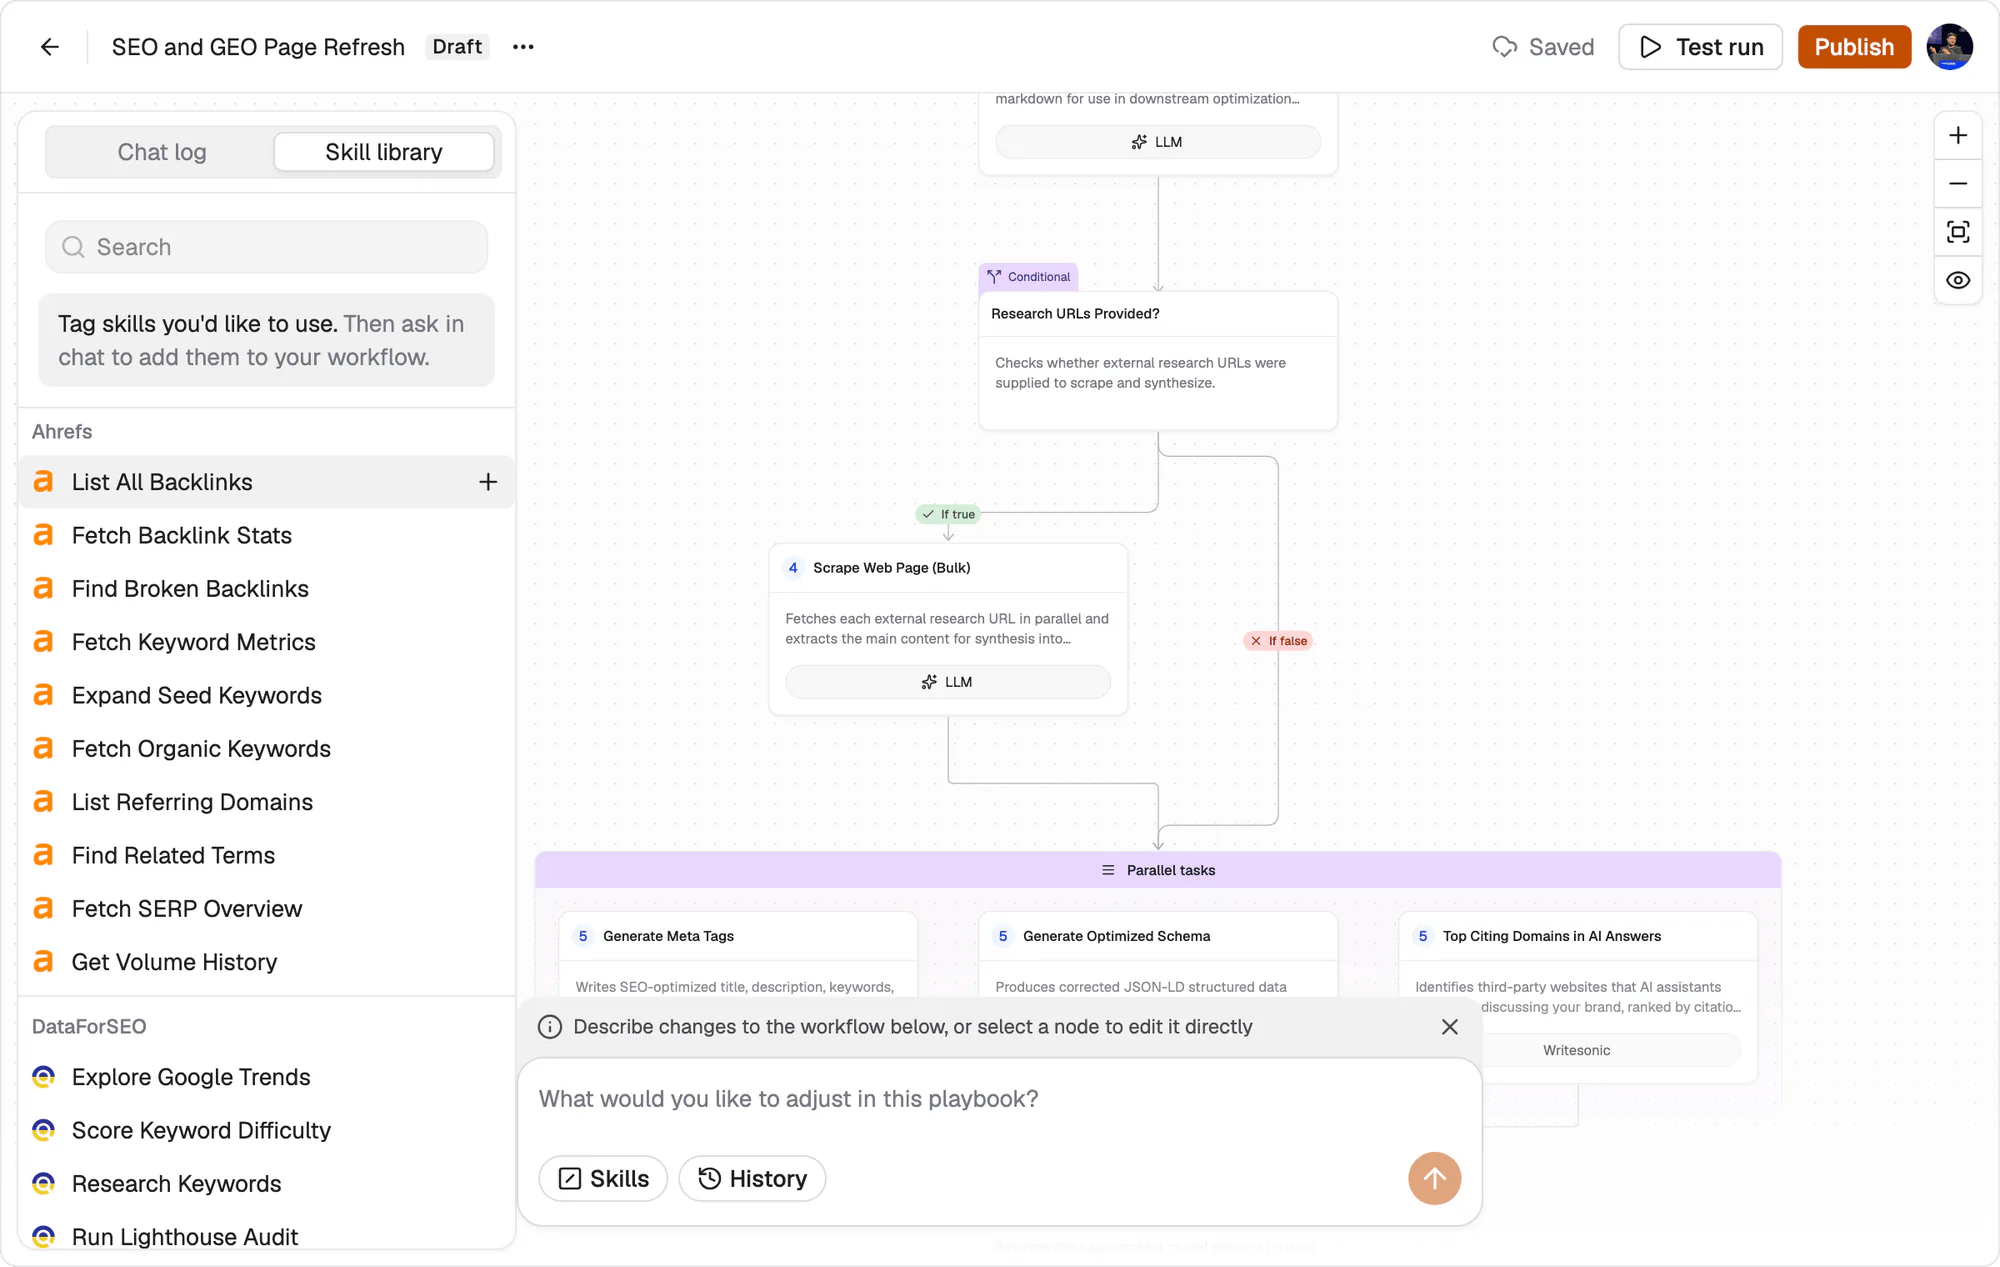 The canvas runs from **Start** through a **Manual input** node, which is where the playbook's inputs are defined, down through the numbered steps to **End**. Steps that don't depend on each other sit under a **Parallel tasks** bar and run together. A **Conditional** node splits the path, and its two branches are labelled **If true** and **If false**.
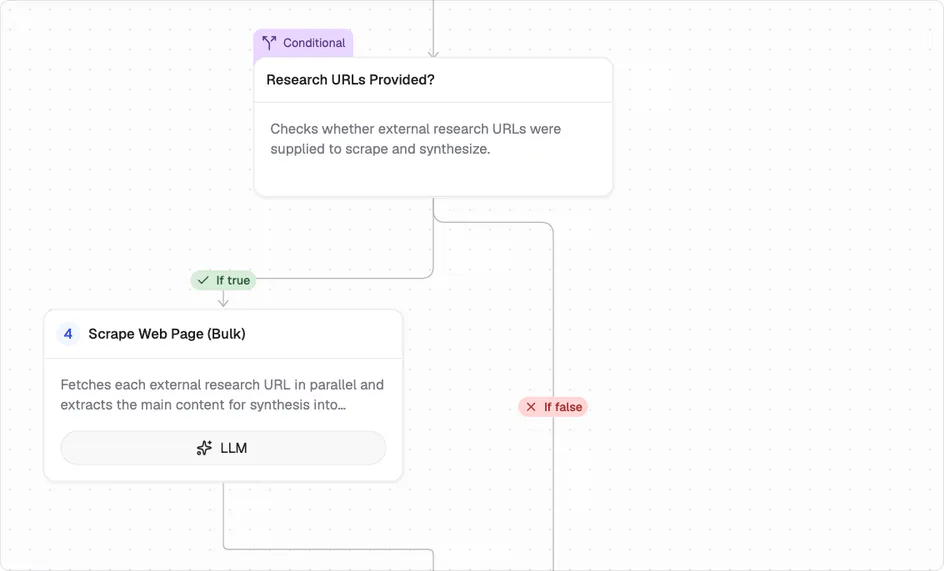 So you can read the whole procedure off the canvas without opening a single step.
The left panel has two tabs. **Chat log** keeps the request you typed, the reasoning behind the workflow it built, and a **Workflow details** card. **Skill library** lists every skill available to the playbook, grouped by the integration it comes from.
## Setup required means it won't run yet
A generated playbook often has steps that still need configuring. Those carry a **Setup required** badge, and the count in the top bar tells you how many are outstanding.
A playbook can look complete on the canvas and still not be runnable. Clear the warnings before you test.
## Edit by describing the change, or by opening the step
Two ways to change a workflow, and they work on the same graph.
Describe what you want different in the box at the bottom, the same way you described the workflow in the first place. Or select a node and edit it directly. Use the first for structural changes and the second when one step is nearly right.
## Test run before you publish
**Test run** executes the playbook on one input while it's still a Draft. Read what comes back and compare it against the procedure you meant to write.
Once the output holds up, **Publish**. The playbook becomes available to run for real, on its own or across a [grid](/agents/grids).
Testing first is the whole point of the Draft state. A generated structure that looks right on the canvas can still produce the wrong deliverable, and one test costs a minute.
## What's next
Run it across many rows.
Start from a template instead.
So you can read the whole procedure off the canvas without opening a single step.
The left panel has two tabs. **Chat log** keeps the request you typed, the reasoning behind the workflow it built, and a **Workflow details** card. **Skill library** lists every skill available to the playbook, grouped by the integration it comes from.
## Setup required means it won't run yet
A generated playbook often has steps that still need configuring. Those carry a **Setup required** badge, and the count in the top bar tells you how many are outstanding.
A playbook can look complete on the canvas and still not be runnable. Clear the warnings before you test.
## Edit by describing the change, or by opening the step
Two ways to change a workflow, and they work on the same graph.
Describe what you want different in the box at the bottom, the same way you described the workflow in the first place. Or select a node and edit it directly. Use the first for structural changes and the second when one step is nearly right.
## Test run before you publish
**Test run** executes the playbook on one input while it's still a Draft. Read what comes back and compare it against the procedure you meant to write.
Once the output holds up, **Publish**. The playbook becomes available to run for real, on its own or across a [grid](/agents/grids).
Testing first is the whole point of the Draft state. A generated structure that looks right on the canvas can still produce the wrong deliverable, and one test costs a minute.
## What's next
Run it across many rows.
Start from a template instead.